Sunday, December 28, 2008

A Couple of Cupcakes

I was tasked with making the cupcakes for a family holiday party a few weeks ago (I say tasked but I actually volunteered). I spent a fair amount of time deliberating over what kind of cupcakes to make. I had to make something that would accommodate a large number of people, not all of whom are adventurous eaters. There were also some little children in attendance. Eventually I decided I would just make chocolate and vanilla mini-cupcakes with chocolate and vanilla butter-cream frosting. For the Chocolate I used the basic recipe that underlies my Mexican Chocolate Cupcakes (minus the cinnamon), and for the vanilla I used the famous Magnolia Bakery recipe (which I got here). I have to say, maybe it’s just me, but I’m not a huge fan of the magnolia bakery recipe. There’s nothing wrong with them, but they’re also nothing special. I tend to think they taste a little like muffins. But perhaps that’s just the nature of plain vanilla cupcakes. These cupcakes were a hit though, everyone was happy to have them, and there were no complaints. I found that the frosting recipe I used did not make enough, so I increased it here.

Chocolate Cupcakes

Makes ~ 30 minis

1 stick (1/2 Cup) unsalted butter
¼ Cup cocoa powder
3/8 Cup of water
1 Cup sugar
1 egg
¼ Cup well shaken buttermilk
1 tsp vanilla paste (or extract)
1 Cup all purpose flour
½ tsp baking soda
1/8 tsp Salt

1. Preheat the oven to 350 degrees. Melt the butter in a heavy bottomed sauce pan over low heat. Add in the cocoa powder and whisk until smooth. Then add the water and mix until smooth again. Remove from heat

2. One at a time mix in the sugar, egg, buttermilk, and vanilla

3. In a bowl, whisk together the flour, baking soda, cinnamon, and salt

4. Sift the dry ingredients over the wet, and whisk until well combined.

5. Fill cupcake liners 2/3 full. Bake for 9-12 minutes, or until cupcakes have set and a tester comes out clean. Remove from the oven and let set.


Vanilla Cupcakes

Makes ~ 48 minis

1 1/2 cups self-rising flour
1 1/4 cups all-purpose flour
1 cup (2 sticks) unsalted butter, softened
2 cups sugar
4 large eggs, at room temperature
1 cup milk
1 teaspoon vanilla bean paste

1. Preheat oven to 350 degrees. Whisk together flours and set aside. Cream the butter and sugar in a mixer on medium speed until fluffy. Add the eggs one at a time, and beat for 1 minute after each addition.

2. Combine the milk and vanilla. With the mixer on low speed, add 1/3 of the flour, followed by half the milk mixture. Continue alternating like this until everything is added. Beat only just enough to combine.

3. Fill cupcake liners 2/3 full. Bake for 20 minutes, or until a tester comes out clean. Remove from the oven and let cool completely.


Buttercream

1 ½ cups (3 sticks) unsalted butter, softened 
4 ½ cups confectioner’s sugar 
2 Tbs vanilla bean paste (or extract) 
3 – 4 Tsp milk (any kind) 
2 T cocoa powder

1. Beat together the butter and confectioners sugar until smooth. Beat in the vanilla.

2. Beat in enough milk that the mixture is still, but pipable (you don’t want it to be too firm).

3. Remove half of the frosting from the bowl. This is the vanilla frosting. Beat the cocoa powder into the remaining half. This is the chocolate frosting.

4. Decorate the cupcakes with the frosting, top with sprinkles if desired.


Out of Office

Hey All, I'm going to be out of town for the next couple of weeks. I have backlogged some posts, so there will still be some automatically scheduled updates, but I won't be around to respond to comments. Hope you all have a happy new year!

Tuesday, December 23, 2008

A Christmas Tradition

Not every year, but many years, my mom makes us a Buche de Noel (Yule Log) for Christmas Eve. It is a process that usually takes her a fair amount of time, and often involves her cursing like a sailor. Well, this year, with my new found blog and baking habit, I thought I would take a crack at it. A friend of mine was having a holiday party, and I thought it would be the perfect thing to bring along. I approached the recipe with some trepidation, as I had only ever tried one other roll cake, and it did not turn out well.  I used the recipe from The Cake Bible by Rose Levy Beranbaum, which deviated in many ways from a traditional buche, which has a genoise cake and buttercream filling. Her buche instead uses a flourless soufflé cake, and is filled with whipped cream, then covered in ganache. Having no experience, and wanting something easy to start with (her recipe was very straightforward), I decided to use her suggestions, and, I was very happy with the results. This cake is not very sweet in the way a traditional American cake often is. Apart from the meringue mushrooms there was only about 1/3 of a cup of sugar in this whole recipe (excluding the sugar already in the chocolate). However, the tastes in the cake come together really well, and the lack of sweetness didn’t bother me. If anything it really brings out the richness of the chocolate.

I adorned my cake with meringue mushrooms, which no buche is complete without. If you want additional adornment, my mother used to make a simple green frosting that she would use to pipe vines and leaves. I was too lazy to go to that much trouble. The Cake Bible also suggests marzipan leaves and meringue pine needles, both of which struck me as too much work.

Assembly instructions for this recipe are at the bottom, though you may wish to make the ganache and meringue mushrooms once you have filled the roll and left it to set.

Happy Holidays!

Buche de Noel

Chocolate Cloud Roll

¼ cup + 2 T sugar (divided) 
6 large eggs, separated 
4 oz. bittersweet chocolate, melted 
¾ tsp cream of tartar 
1 T unsweetened cocoa

1. Preheat the oven to 350 degrees. Grease a 17 x 12 jellyroll pan. Line the pan with foil, leaving overhangs on the long sides. Grease and then flour the foil (it is crucial that you do this well).

2. In a mixing bowl beat ¼ of the sugar with the egg yolks for five minutes, or until they are light and fluffy. Add the chocolate and beat until incorporated. Scrape down the sides of the bowl.

3. In a different bowl, beat the egg whites until foamy. Add the cream of tartar and beat until soft peaks form. Gradually add the remaining 2 T of sugar, beating until stiff peaks form when the beater is raised slowly.

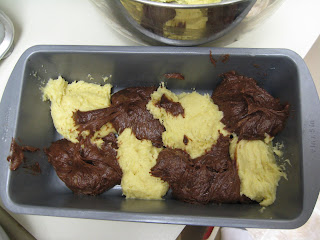
4. Fold ¼ of the egg white mixture into the yolk mixture to lighten it. Gently fold the remaining whites into the yolks. Pour the batter into the prepared pan, spreading evenly with a spatula. Bake for 16 minutes, the cake will have puffed and will spring back when lightly pressed.

5. As soon as the cake is out of the oven, sprinkle it with the cocoa powder. Take a clean dish towel, wet it, and wring it out. Place the towel over the cake while it cools.


Whipped Cream

1 cup heavy cream 
2 T granulated sugar 
2 T cocoa powder 
1 tsp instant espresso powder 
½ tsp vanilla

1. Put all of the ingredients in a large mixing bowl. Stir to combine. Place the bowl and whisk attachment for your mixer in the fridge for at least 15 minutes.

2. Using a mixer set on medium speed, whip the cream to soft peaks.


Dark Chocolate Ganache

12 oz. bittersweet chocolate 
1 2/3 cup heavy cream 
2 T Frangelico

1. Break the chocolate into pieces. Place in the bowl of a food processor and process until very fine. Heat the cream to the boiling point. With the food processor running pour in the heated cream. Pulse until smooth. Transfer to a bowl and whisk in the Frangelico. Let cool until the ganache has reached a spreadable consistency (this can be expedited by putting it in the fridge or freezer, but watch it closely to make sure you don’t over cool it and have to start over.


Meringue Mushrooms

2 large egg whites 
¼ tsp cream of tartar 
½ cup + 1 T superfine sugar 
Cocoa powder for dusting
1. Preheat the oven to 200 degrees. In a mixing bowl fitted with a clean whisk attachment, whip the egg whites until frothy. Add the cream of tartar and beat on medium speed while gradually adding 2 T of the sugar. When soft peaks form add 1 more T of sugar and increase speed to high. When stiff peaks form gradually beat in the remaining sugar.

2. Using a pastry  bag fitted with a ½ inch tip (for me this was just a bear coupler), pipe mushroom caps and stems onto a baking sheet lined with a silpat or parchment. To pipe stems, keep the bag close to the sheet, rising slowly while squeezing, so that domes form. Use the tip of the bag to smooth any point that remains when you remove the tip. To pipe stems, start close to the sheet and rise quickly, so that you pipe tapered columns that end in a point.

3. Bake in the oven for 45 minutes to an hour, until meringue is crisp. Remove from the oven and allow to cool completely.

4. Dust the caps with cocoa powder. To assemble mushrooms, I just stuck the pointy end of the stems straight into the bases of the caps. Others suggest piping a little raw meringue or using chocolate to hold these together.


Assembly

1. Lifting with the foil overhang, gently slide the cake from the pan onto the counter.

2. Spread the whipped cream evenly over the cake

3. Beginning with the side closest to you, Use the foil to lift one edge of the cake and begin to roll it. As you go check to make sure the cake is not sticking to the foil. If this goes unchecked it will remove large strips from your cake. If any parts of the cake do come lose (mine did), use a little bit of whipped cream to stick them back on.

4. Once the cake is rolled, put it in the fridge for an hour to set.

5. Remove the cake from the fridge. Cutting at a diagonal, remove 5-6 inches from the cake. This will be used to make the branch.

6. Spread ganache over the cake. Try to use a light touch. Especially when it comes to the ends. Place some extra ganache where you want the branch to go on, and place the branch there, pressing it into the ganache. Cover the branch in ganache as well. Remember this is supposed to look like a log, so the ganache doesn’t need to be perfectly smooth or even.

7. Use the times of a fork to make a grain pattern in the frosting. At the ends and top of the knot move the fork in a circle. Cover and refrigerate until one hour before serving. Only attach the meringue mushrooms just before serving.

8. Serve

Friday, December 19, 2008

Cardamom Snaps


Another recipe from the Better Homes and Gardens website, these cookies are similar to ginger snaps, but with a nice cardamom flavor. Molasses cookies aren’t my favorites, but I have a very hard time saying no cardamom (it’s a personal favorite flavor of mine). I thought these came out very nicely, soft and chewy, with a good flavor of cardamom, though the molasses is definitely the dominant flavor. As a plus, they came together in only a few minutes which is always a plus.


Cardamom Snaps

Makes about 36

¾ cup shortening 
1 cup packed brown sugar 
1 tsp baking soda 
2 tsp ground cardamom, divided 
1 tsp cinnamon 
¼ cup mild molasses 
1 egg 
2 ¼ cup AP flour 
¼ cup granulated sugar

1. Preheat oven to 375 degrees. Beat shortening on medium speed in a mixer for 30 seconds. Add the brown sugar, baking soda, 1 ½ tsp cardamom and cinnamon. Beat to combine. Scrape down the sides of the bowl.

2. Add the molasses and egg and beat to combine. Beat in the flour until the dough comes together.

3. Combine the granulated sugar and the remaining ½ tsp cardamom in a bowl. Roll the dough into one inch balls, and roll the balls in the cardamom-sugar mixture. Space the balls two inches apart on an ungreased cookie sheet, and bake for ten minutes, or until tops are cracked and edges are set. Let cool on a wire rack.

Monday, December 15, 2008

Gingerbread Houses


I am officially half way done with law school. This afternoon I took my last final of the semester, and now I am on break. However, not being done with finals yet didn’t stop me from making some gingerbread houses over the weekend. I think people tend to think of gingerbread houses as a child’s activity, and to a degree I think I that’s true. But of course part of the holidays is being childish. People decorate, they make cookies, they look forward to presents, and if they’re doing it properly embrace at least a little of the childishness of the season. And of course there’s no better excuse to act childish than needing a break from law school finals.

I got the recipe I used for the gingerbread houses here. The recipe was really simple to make, though it took a lot of flour. I also broke one of my spatulas trying to turn the dough, so be careful, this stuff gets thick. For decorations use pretty much whatever you can think of. This recipe makes enough dough to make one house of the dimensions provided, plus a lot of extra cookies to cut out as men, Santas, trees, snowmen, or whatever else you might choose. If you’re planning on eating the cookies I recommend cooking them for a minute or two less than you cook the house parts for.

To make a gingerbread house you need to start by cutting out templates. I used the dimensions provided here.

Gingerbread House

Makes 1 house plus cookies

6 cups all purpose flour 
1/2 teaspoon baking powder 
4 teaspoons ground ginger 
4 teaspoons ground cinnamon 
1/2 teaspoon ground cloves or allspice 
1/2 teaspoon salt 
1 1/2 sticks (12 Tbsp) butter, softened 
1 1/2 cups packed light brown sugar 
2 large eggs 
1 cup dark molasses 
1 Tbsp water1. Mix together the dry ingredients, flour, baking powder, ginger, cinnamon, cloves, and salt. Set aside.

2. Cream together the butter and brown sugar until fluffy. Add the eggs, molasses and water. Beat until fully combined. Add half the flour to the mixture, and beat to combine.

3. Combine the dough with the remaining flour and knead together (it gets a bit thick for a mixer). I actually found it easiest to use my hands to knead it together. Refrigerate the dough for at least two hours.

4. Take the dough out of the fridge and divide into halves or quarters. Working on a well floured surface, roll out the dough until it is an even thickness of ¼ inch thick. Spread a little flour on top of the dough, and gently press a template onto the dough. Using a sharp knife cut out the dough shapes.

5. Bake the cut out shapes for 12-15 minutes, or until browned and dry. Rotate the sheets half way through. Remove from the oven, trim off any pieces of the gingerbread to correct the pieces.

6. Let cool completely


Royal Icing

2 egg whites 
¼ tsp cream of tartar 
2 ¼ cups powdered sugar

1. Beat the egg whites and cream of tartar on high speed until frothy.

2. Beat in the sugar on high speed until frosting is smooth, glossy, and thick.


Assembly

1. Cover a piece of cardboard or a baking pan with tin foil. Pipe a line of royal icing where you want the front of the house to be. Press the bottom edge of the front piece into the frosting. Use a heavy can to support it.

2. Pipe a line of frosting at a right angle to the front of the house, where one of the sides will be. Press the side into the icing. Pipe some frosting up the corner between the two pieces of gingerbread, both on the inside and outside of the house. Repeat this process with the other side of the house, and then the back. Allow the royal icing to set for a few minutes, until the house can stand on its own.

3. Pipe frosting all along the upper edges of the house. Apply the two roof pieces, and pipe some frosting at the crest of the roof between them. Hold the roof pieces in place until they will stay up on their own. Attach the chimney with a little more frosting.

4. Apply decorations as you choose, make more royal icing to add decorations as needed.

Saturday, December 13, 2008

Spiced Pumpkin Dunking Sticks


Well, its finals time, which means I’m hunting for just about anything to do other than study. A friend of mine recently sent me looking at the Better Homes and Gardens holiday cookie recipes, and I must say a lot of them look pretty appealing. I didn’t want to go to the store, so I picked a recipe I already had all the ingredients for (believe it or not I did have a spare can of pumpkin sitting around). When it came to piping them out, the website’s instructions said to pipe them out into a corkscrew motion, which I found to be impossible. The dough is far too thick for any kind of piping. Instead I rolled the dough into logs with my hands into logs about 4-5 inches long and 1 inch thick, and baked them like that, which worked fine. I also didn’t have a lemon, so I used orange juice in its place in the glaze. I thought these cookies were ok, but a friend I gave them to raved about them.


Spiced Pumpkin Dunking Sticks

Makes About 20

1 cup butter, softened 
½ cup sugar 
1 tsp ground cinnamon 
¾ tsp baking powder 
½  tsp ground nutmeg 
½ tsp ground ginger 
¼ tsp salt 
¼ tsp ground cloves 
1/3 cup canned pumpkin 
1 egg 
1 tsp vanilla 
2-1/2 cups all-purpose flour

1. Preheat oven to 400 degrees. Beat the butter on medium speed in an electric mixer for 30 seconds. Add the sugar, cinnamon, baking powder, nutmeg, ginger, salt, and cloves, and beat until fully combined.

2. Scrape down the sides of the bowl. Add the pumpkin, egg and vanilla and beat until combined. Add the flour and beat in on low speed until combined. This might be a strain on your mixer, so you may have to beat in the last of the flour by hand.

3. Using a wide tip, pipe the dough using a corkscrew motion, making cookies about 4 to 5 inches long. If you can’t make this work (which I can’t), just use your hands to roll the cookies into logs about 1 inch thick and 4 – 5 inches long.

4. Place on an ungreased cookie sheet and bake for 5 to 7 minutes, or until just firm to the touch.

5. Let the cookies cool completely. Once Cool, glaze (recipe follows).


Glaze

1 ½ Oz. Cream Cheese

1 T unsalted butter, softened 
¼ tsp finely grated lemon peel 
1 tsp lemon juice 
¼ tsp finely grated orange zest 
¾ cup powdered sugar 
2-3 tsp milk

1. Beat together the cream cheese and butter until smooth. Add the lemon and orange peels, the lemon juice, and the sugar.

2. Mix in enough milk for the glaze until it can be drizzled.

3. Drizzle the glaze over half of each cookie. Let sit for about 3 hours, or until glaze is set.

Thursday, December 11, 2008

Say Chowda!


It being finals time, I made myself a big pot of soup, as per my finals tradition. I do it so that I can have something better than lean cuisines to eat, but don’t have to go to the work of cooking every night. This recipe started out as a recipe for corn and poblano chowder from epicurious, but I substantially modified it. The result is something that is almost close to a loaded baked potato soup. It’s got a pretty solid kick to it, but I like it a lot. It will definitely serve me well through finals, and is good on any cold night when a hearty meal is needed.

Corn and Poblano Chowder

Makes 6 – 8 servings

5 strips bacon 
1 medium onion, coarsely chopped 
3 celery stalks, coarsely chopped 
3 cloves garlic 
3 large poblano chilies, roasted and skinned, seeded, chopped 
3 redskin potatoes, cut into 1 inch cubes 
2 14 3/4- to 15-ounce cans cream-style corn 
1 16-ounce package frozen corn kernels, thawed 
2 14-ounce cans low-salt chicken broth 
1 cup fat free half and half 
1/2 teaspoon cayenne pepper 
6 tablespoons chopped fresh cilantro 
8 oz. shredded cheddar cheese 
2 lbs frozen, precooked salad shrimp, thawed

1. Put the onion, celery, garlic and poblanos into a food processor and pulse until the vegetables are finely diced (don’t liquefy them), set aside. Cook the bacon until it is crispy. Set aside to drain on a paper towel.

2. Pour 1 -2 tablespoons of the bacon grease into a large pot over medium high heat. Add the finely chopped vegetables and sauté until soft, about six minutes. Add the potatoes, and the next 5 ingredients (through cayeene) to the pot. Stir and bring to a simmer. Cover and let simmer until potatoes are soft and flavors are blended, 20 to 25 minutes.

3. Reduce heat. Once the mixture has stopped bubbling add 2/3 of the cheese, 4 Tablespoons of the cilantro, and 4 of the five strips of bacon, crumbled (reserving the remainder of each for garnish). Continue cooking just until cheese is fully melted an mixed with the soup (1-2 minutes). Add the shrimp just before serving. Serve garnished with cheese, bacon, and cilantro, and with a nice crusty bread or oyster crackers on the side.

Monday, December 8, 2008

Rugelach


Amongst the cookies I made for my holiday party last week (the third, some roll out sugar cookies, won’t be featured because they got eaten before I could take pictures) were rugelach from Dorie Greenspan’s Baking from My Home to Yours. I thought of all the cookies I made for that night, these were my favorite. I didn’t use currants in this recipe, because I didn’t have any, but I think they would have been good.

Dorie Greenspan’s Rugelach

Makes 32

Dough

4 oz. Cold Cream cheese, cut into 4 pieces 
8 T (1 stick) unsalted butter, cut into 4 pieces 
1 cup AP flour 
¼ tsp salt

Filling

2/3 cup raspberry or apricot jam, or marmalade 
2 T sugar 
½ tsp cinnamon 
½ cup chopped pecans
¼ cup plump, moist dried currants 
4 oz. bittersweet chocolate, finely chopped, or 2/3 cup mini-chocolate chips

Glaze

1 large egg 
1 tsp cold water 
2 T coarse decorator’s sugar (or regular)

1. Make the dough: Let the cream cheese and butter soften on the counter for 10 minutes (you don’t want them fully softened). Put the flour and salt in a food processor, scatter the butter and cream cheese over them. Pulse the machine 6 – 10 times, then scrape down the sides of the bowl and run the bade until the dough forms large curds. Don’t work it so long that it forms into a ball on the blade.

2. Divide the dough in half, flatten each half into a disk, wrap in plastic, and refrigerate for 2 hours.

3. (These things are mixed in three separate bowls, don’t mix them all together) Heat the jam in a saucepan over low heat until it liquefies. Mix the cinnamon and sugar together. Mix the nuts, chocolate and currants together.

4. Take the dough out of the fridge, let it rest just until it is soft enough to roll out. On a lightly floured surface, roll out half the dough into an 11-12 inch circle. Spoon or brush a thin gloss of the jam over the dough. Sprinkle have the cinnamon and sugar mixture evenly over the jam. Scatter half the chocolate mixture over the dough. Cover the filling with a piece of wax paper and gently press the filling into the dough.

5. Use a pizza cutter to divide the dough into 16 triangles. The easiest way to do this is to cut the dough into quarters, and then cut each quadrant into 4. Starting at the base of each triangle, roll the dough up until each cookie becomes a little crescent (like a crescent roll). Repeat with the remaining dough half. Refrigerate the rolled up cookies for 30 minutes.

5. Preheat the oven to 350 degrees. Mix the egg and water together. Brush the cookies with the glaze. Sprinkle a little sugar over each cookie. Bake the cookies for 20 to 25 minutes, until they are puffed and golden, rotating the sheets from top to bottom and front to back halfway through. Let cool completely on wire racks.

Thursday, December 4, 2008

Chocolate Peppermint Pinwheels

I know it’s been awhile, but with going home for Thanksgiving and studying for finals I just haven’t had much time to cook lately. Fortunately I threw a holiday party last night, and so got the opportunity to make some new Christmas cookies, which will appear over the next week or so. This first recipe comes from Alton Brown, and I have to say I thought they were disappointing. While these cookies make a great presentation, I thought the flavor was lacking. The peppermint came through ok, but the chocolate didn’t. In addition I thought the whole cookie wasn’t quite sweet enough, and tasted of flour. Maybe it was just me, but I don’t think these are worth the trouble of making again.

Alton Brown’s Chocolate Peppermint Pinwheels

Makes 36

3 cups AP flour 
¾ baking powder 
½ salt 
1 cup (2 sticks) unsalted butter, softened 
1 cup sugar 
1 egg, beaten 
1 T milk
3 oz. Unsweetened Chocolate, melted 
1 tsp vanilla 
1 egg yolk 
1 tsp peppermint extract 
½ cup crushed candy canes or peppermint candies (I ground them pulsing in a food processor)

1. Sift together the flour, salt and baking powder, and set aside. In the bowl of a standing mixer cream together the butter and the sugar until pale and fluffy.

2. Add the egg and the milk and beat to combine. Scrape down the sides of the bowl, turn down the mixer speed to low, and add the flour. Beat until the dough pulls away from the sides.

3. Divide the dough in half. Use your hands to mix the chocolate and the vanilla into half the dough. Mix the egg yolk, peppermint extract, and crushed candy into the other half of the dough.

4. Sprinkle powdered sugar onto wax paper and roll out the chocolate dough into a rectangle, until it is about a ¼ inch thick. I used a cookie sheet as a guide for size. Repeat with the peppermint dough (I used the cookie sheet to make sure that the two doughs were the same size).

5. Lay the peppermint dough over the chocolate dough, making the edges flush. Push the edges together. Using the wax paper to help, roll the dough into a log. Wrap the log in plastic wrap and refrigerate for two hours or up to a day.

6. When ready to bake, preheat the oven to 375 degrees. Use a knife to cut the log into ½ inch slices, rotating ¼ turn after each cut to make sure the log stays round. Place the cookies on a parchment or silpat with one inch between each cookie.

7. Bake for 12 -13 minutes, rotating the sheets half way through. Let cool on the pan for a minute, then transfer to a wire rack to cool.

Sunday, November 23, 2008

Praline Pumpkin Pie

This recipe for Praline Pumpkin pie probably predates my birth. My mom has been making it for as long as I can remember, and easily from before then. My mother’s copy of the recipe resides on the torn out page of the magazine she originally got the recipe from, she thinks it was Food and Wine. The recipe is by far my favorite for pumpkin pie. The pumpkin filling is nicely spiced, but not overly sweet. This is contrasted by the buttery praline at the bottom of the pie. In addition the smoothness of the pie combines wonderful with the mild crunch of the pecans and praline. I just can’t imagine a pumpkin pie that’s better.

As far as crusts go, the original recipe comes with a recipe for a hot water crust, which we don’t use. I actually bought my pie crusts this time (horror of horrors) because I just didn’t feel like I had the time to make them (I am preparing for finals after all). A regular pie crust should do though, or, my mother has had success using this unusual pie crust made with Vodka.  

Praline Pumpkin Pie

Makes 2 nine inch pieswe

Pie Filling:

½ cup sugar 
½ cup light brown sugar 
1 T flour 
1 T Bitters (optional, but we always use it) 
1 t ground cinnamon 
½ t ground ginger 
½ t salt 
¼ t nutmeg 
½ t cloves 
1 egg, lightly beaten 
2 T butter 
1 29 oz. can pumpkin puree 
1 12 oz. can evaporated milk 
¼ cup milk 
1 cup water1. In a bowl whisk together the first 9 ingredients (sugar through cloves), whisk in the egg and set aside.

2. Melt the butter in a large skillet over low heat. Add the pumpkin puree and cook for 10 minutes, stirring occasionally.

3. Add the pumpkin puree to the sugar mixture. Gradually stir in the evaporated milk, followed by the milk, and then the water. At first it may seem like they won’t come together, just keep stirring. Set the mixture aside.


Praline

4 T unsalted butter, softened 
2/3 cups light brown sugar 
2/3 cups pecans, coarsely chopped

1. Cream together the butter and the sugar until light and fluffy. Stir in the pecans.


Assembly.

2 9 inch pie crusts 
Praline mixture 
Pumpkin filling

1. Use a fork to poke holes all over the pie crusts. Freeze them for ten minutes.

2. Divide the praline mixture in half, and spread half in the bottom of each pie. Make sure to cover the whole bottom of the pie. Bake the pies in the 450 degree oven for 10 minutes. Remove the pies

3. Turn the oven temperature down to 400 degrees. Let the pies cool for a few minutes. Divide the pumpkin filling between the two pies (you may have a little extra filling). Smooth the surface of the pies with a spatula. Bake the filled pies for 50 minutes to an hour, or until the center is firm and the crust is golden. Let cool completely before serving


Saturday, November 15, 2008

Inverted Apple Tart Cupcakes

Awhile ago I had the idea that you might be able to replace the wrapper in a cupcake with very thinly sliced apple. I decided I wanted the cupcakes to be some sort of cross between a cake and a tart, and so I used a frangipane based cake recipe I modified from Orangette. The result was something that was sort of like an apple upside down cupcake, and was really delicious. The cake was especially almondy. Overall though, I’m honestly not sure it was worth the trouble, as getting all the apple slices made and the cupcake cups lined with them was a bit of a pain. The almond cake recipe is good enough on its own though that it is certain to show up again. Most of the work in this recipe shows up in the assembly section, I tried to take decent pictures. The cake actually comes together really easily. Use Granny Smith Apples for this recipe, they stay firmer than most others when baked (I tried Golden Delicious on a test cupcake, they just fell apart). To make thin strips out of the apples I used a vegetable peeler. I used this type, except I got a cheap one at Kroger for $1. It’s surprisingly effective, though you should be very careful not to peel your fingers (I’ve done it several times now).

Almond Cake

Makes ~ 9 cupcakes

½ cup flour
½ cup ground almonds, or almond flour/meal*
1 tsp. baking powder
Pinch of salt
8 T (1 stick) unsalted butter, room temperature
¾ cup sugar2 eggs
1 tsp. vanilla extract
2 tsp. almond extract

1. Preheat oven to 350 degrees. Whisk together the flour, ground almonds, baking powder, and salt.

2. Put the butter and sugar in the bowl of a standing mixer, and beat until fluffy. Add the eggs, flour, and extracts and beat until combined.

3. Set the dough aside while preparing the apples.

*You can make almond flour by grinding blanched almonds in a food processor until they reach a sandy consistency (this is what I did). I've been told you should be careful not to overdo it, otherwise you can end up with almond butter. You can also buy almond flour / meal at some grocery stores or specialty stores.

Assembly

2 Granny Smith Apples

1. Peel an apple. Cut the apple into quarters and remove the core. Use the apple peeler to cut very thin strips of apple.

2. Layer the strips around the cupcake pan. Press the apples in hard so that they take the shape of the cup. Make sure the apples overlap, to try to reduce the amount of cake that gets through to get stuck to the pan.

3. Fill each apple lined cup with a little less than a ¼ cup of batter. I recommend using a measuring cup and a spoon to get the batter in. Try to be careful, because once the batter gets in there, you really can’t move it around without messing up the apples.

4. Bake the cupcakes for 17 – 20 minutes, or until a tester comes out clean.

5. Let the cupcakes cool to room temperature on a wire rack. Once they are cooled run a dull knife around the edges of the cupcakes, then invert onto a flat surface. I didn’t frost these, because I thought they were good as is. Store in an airtight container at room temperature.

Wednesday, November 12, 2008

Snickerdoodles

I find myself turning yet again to Martha Stewart’s cookie book when I’m looking for a cookie recipe. A friend of mine was having an event at his place, and I happened to know he was a big fan of snickerdoodles, so I decided to whip these up. Fortunately, this recipe comes together incredibly quickly, and turned out very good. They weren’t quite as soft as snickerdoodles I’m used to (admittedly, I don’t eat a lot of snickerdoodles), but my guess is that it’s because this recipe uses butter in place of shortening.

Martha’s Snickerdoodles

Martha says it makes 18, I found closer to 24

2 ¾ cups flour 
2 tsp baking powder 
½ tsp salt 
1 cup (2 sticks) unsalted butter, room temperature 
1 ½ cups plus 
2 T sugar 
2 large eggs 
2 tsp ground cinnamon

1. Preheat oven to 350 degrees Sift together the flour, baking powder, and salt.

2. Beat together the 1 ½ cups of sugar and the butter at low speed until fluffy. Turn the mixer speed up to medium and add the eggs. Gently mix in the flour mixture.

3. Roll the dough into 1 ½ inch balls. Mix the remaining 2 T of sugar and the cinnamon. Roll the dough balls in the cinnamon sugar mixture until they are completely covered.

4. Bake the cookies (I found an insulated baking sheet worked best for these), leaving them lots of room on the sheets to spread out. Bake for 12-15 minutes, or until the edges are golden. Let cool on a rack. 

Saturday, November 8, 2008

Pound Cake

I finally got a copy of Baking From My Home to Yours by Dorie Greenspan, and wanted to try making something from the famed book. Since I didn’t really have an occasion to make anything fancy, I decided to make her Perfect Pound Cake. I decided to make the marbled variation, with the addition of a little almond extract. I have to say, this pound cake was good, but I wouldn’t call it perfect. I’m not entirely sure that I can say what was missing, although I didn’t think it was quite moist enough. I also thought that the outside of the loaf got a little too crisp, but it certainly didn’t reach the point of burning, so I can’t complain much. The main failing may have been my use of inferior (Kroger brand) butter. The book recommends using the best butter you can find, and using something of better quality probably would have improved the flavor. On the plus side, this recipe is really fast to throw together. Overall it was good, but I think I’ll keep searching for a favorite.

Dorie Greenspan’s Perfect Pound Cake

2 cups all purpose flour 
1 tsp baking powder 
¼ tsp salt
1 cup (2 sticks) unsalted butter, room temperature 
1 cup sugar
4 large eggs, room temperature 
1 tsp vanilla extract 
½ tsp almond extract 
4 oz. bittersweet chocolate, melted and cooled

1. Preheat the oven to 325 degrees. Butter a 9 x 5 loaf pan. In the bowl of a standing mixer fitted with the paddle attachment beat together the butter and sugar for five minutes.

2. While the butter is beating, in a separate bowl whisk together the flour, baking powder, and salt

3. Turn the mixer up to medium speed. Add the eggs to the butter mixture one at a time, beating for 1-2 minutes after each addition, and regularly scraping down the sides. Add the vanilla and almond extract along with the last egg.

4. Fold the flour mixture gently into the butter mixture. Divide the batter in half, and add half of it to the chocolate. Fold the batter and the chocolate together.

5. Spoon the batters into the loaf pan using large spoonfuls, alternating regular and chocolate batters. Once all of the batter is in the pan, swirl a butter knife through the cake, this will make it marble. Smooth the top of the cake.


6. Place the loaf pan on an insulated cookie sheet, or on two regular cookie sheets placed one inside the other. Bake the pound cake for 70-75 minutes, or until a knife stuck into the middle comes out clean.

7. Take the cake out of the oven and let it rest in its pan on a cooling rack for 30 minutes. Run a blunt knife around the edges of the pan, and invert to remove the cake. Let it cool to room temperature.

Wednesday, October 29, 2008

Just in Time for Halloween

I made these truffles for a Halloween party. As far as ingredients go, these are super easy to make, although the process of making them is a little time consuming (you need to leave time of chocolate to set at various points). The end result is something that looks neat, and tastes good (after all it is a truffle). For the veins and pupils I just used Betty Crocker, because it didn’t seem worthwhile to make my own. I also didn’t bother to temper the white chocolate I used in this recipe, but it wouldn’t be a bad idea if you know how to do it.

Eyeball Truffles

12 oz. semisweet chocolate chips 
2/3 cup heavy cream
8 oz. white chocolate
M&Ms 
Red and Black frostings

1. Pour the chocolate chips into a bowl. Put the cream in a sauce pan over medium high heat. Heat the cream until bubbles just begin to form around the edges.

2. Pour the heated cream over the chocolate. Let sit for 30 seconds, then begin whisking. Whisk until the ganache is uniform. Refrigerate until the ganache is firm enough to roll.

3. Roll tablespoons of ganache into balls. I do this by rolling the chocolate in my hands, but if you prefer you can use spoons. Put the rolled out truffles on a cookie sheet and refrigerate until cold.

4. While the truffles are chilling put the white chocolate in the bowl of a double boiler. Melt the chocolate, then remove it from the heat.

5. Getting the right balance here is the hard part, if you put the truffles into the white chocolate while it’s too hot, it will melt them, if the chocolate is too cold it won’t smooth out. I would recommend waiting until the white chocolate is just slightly above room temperature, but that’s an estimate.

6. Drop a truffle center into the white chocolate, using a fork quickly roll the truffle in the white chocolate so that it is completely covered, and then remove the truffle from the chocolate and put it on the baking sheet. Immediately push an M&M into the white chocolate. Repeat this until all truffles are dipped.

7. Pipe red frosting onto the truffles as veins, pipe black frosting onto the centers of the M&Ms for pupils. Store in an airtight container.

Sunday, October 26, 2008

Double Pumpkin Pie Cupcakes


It looks like I’ve finally got a recipe ready to get in before this month’s cupcake hero. This month’s theme was squash, a suitable fall theme, and I decided to go with Pumpkin (like pretty much everyone else). Finding inspiration for these cupcakes was easy. Every Thanksgiving my mother makes a pumpkin pie that has a layer of pecan-praline at the bottom, and it is delicious, and the inspiration for these cupcakes. These are pumpkin cupcakes, filled with pumpkin pie, and frosted with a cream cheese frosting flavored with pecan-praline powder and maple syrup. The result was delicious. When I served these last night a number of people told me that these were the best cupcakes I’ve made yet, and while I don’t know that I agree (I find it hard to accept anything without chocolate in it as a “best”), they were certainly very good. At least one person said the cupcakes reminded him of cheesecake, probably because of the cream cheese frosting. This is also one of the only times where I’ve ended up with the right amount of everything (I usually end up with too much or not enough of some part of the cake, like the filling or the frosting)

A note on the frosting: it is not nearly stiff enough to be piped as written. You could probably solve this problem by adding powdered sugar, but I wanted the sweetness to come from the praline and the maple syrup more than I wanted a pipe-able frosting.

Pumpkin Pie Filling

Makes 1 8x8 pan

1 (15 oz.) can pumpkin puree
1 (14 oz.) can sweetened condensed milk
2 eggs, separated
1 tsp cinnamon
½ tsp ground ginger
½ tsp fresh grated nutmeg
½ tsp salt

1. Preheat the oven to 425. You will not bake the pie at this temperature, but do want a hot oven. In a large bowl whisk together the pumpkin puree, the sweetened condensed milk, and the egg yolks.

2. Whisk in the cinnamon, ginger, nutmeg, and salt.

3. In a separate bowl, whip the egg whites to soft peaks. Gently fold the egg whites into the pumpkin mixture.

4. Pour the filling into an 8x8 baking pan (I used Pyrex). Reduce the oven temperature to 375 degrees. Bake the filling until it has set, about 40 minutes. Remove from the oven and let cool fully. While the filling is baking, prepare the other parts of the cupcakes.

Pumpkin Cupcakes (recipe from marthastewart.com)

Makes 24 cupcakes


2 cups all-purpose flour
1 teaspoon baking soda
1 teaspoon baking powder
1 teaspoon coarse salt
1 teaspoon ground cinnamon
1 teaspoon ground ginger
1/4 teaspoon freshly grated nutmeg
1 cup packed light-brown sugar
1 cup granulated sugar
1 cup (2 sticks) unsalted butter, melted and cooled
4 large eggs, lightly beaten1 can (15 ounces) pumpkin puree

1. Reduce the oven temperature to 350 degrees. In a medium bowl whisk together the flour, baking soda, baking powder, salt, cinnamon, ginger, and nutmeg. In a separate bowl whisk together the sugars, the butter, and the eggs.

2. Mix the dry ingredients into the wet. Once they are fully combined, mix in the pumpkin puree.

3. Fill cupcake liners 2/3 full using a ¼ cup measure. Bake the cupcakes for 20-25 minutes, or until a tester comes out clean. Remove from the oven and let cool completely.

Praline Powder

Makes 2 ½ - 3 cups

1 ½ cups sugar
6 T water
1 cup pecan halves

1. Put the water and sugar in a heavy bottomed sauce pan over medium high heat. Stir briefly so that the sugar is mixed with the water.

2. Let the mixture come to a boil. Continue heating. Eventually the mixture should begin turning an amber color. When the mixture reaches a light to medium amber (around 300 degrees on a candy thermometer) remove the mixture from the heat. Immediately pour the nuts into the caramel and shake to combine.

3. Pour the caramel onto an oiled cookie sheet or a silpat. Set aside and let cool and harden (this won’t take too long).

4. Once the praline has hardened, break it into chunks and put it into a food processor. Use the food processor to grind the praline powder until it resembles a coarse sand.

Maple – Praline Frosting

8 oz. Cream Cheese, softened
4 T unsalted butter, softened
2 cups praline powder
½ cup maple syrup (Grade B)
½ cup powdered sugar

1. Beat together the cream cheese and butter until creamy. Beat in the praline powder, maple syrup, and powdered sugar.

Assembly

1. Use the cone method to hollow out the cupcakes.

2. Spoon a healthy amount of pie filling into each cupcake. Place the top back onto the cupcake.

3. Frost with the Maple – Praline Frosting.

4. Keep refrigerated until ready to serve.

Tuesday, October 21, 2008

Pear Sorbet


It’s been a little while since my last update. I can’t claim any particular excuse, I just didn’t around the making anything, or posting anything. I actually made this sorbet about a week ago, it just took me a long time to put it up.

I got the recipe for this pear sorbet from Vanilla Garlic. I changed it a little by cutting the sugar, and replacing some of the pear syrup with Frangelico, but I only used a few tablespoons, which wasn’t enough to make a difference in the flavor, or how it froze. I think the addition is a good idea though, so I would suggest upping the Frangelico if you try this.

Pear Sorbet

Makes ~1 quart

6 Bartlett Pears 
1 vanilla bean 
3 cups sugar 
4 strips of lemon zest 
6 cups of water 
2 Tbs Frangelico

1. Use a vegetable peeler to strip 5 strips of zest off of a lemon. Combine the lemon zest, sugar, and water in a large pot. Cut the vanilla bean in half and scrape the seeds into the water, add the bean.

2. Put the pot on the heat and bring the water up to a boil so that the sugar has dissolved. Reduce the heat to medium.

3. Peal the pears and cut off the bottoms so that they can stand up. Put the pears in the poaching liquid for at least 10 minutes.

4. Remove the pears from water one at a time (do not discard the poaching liquid). Cut the meat from each pear, discarding the stem and core. Put the pears into a food processor or large blender.

5. Puree the pears with 2 cups of the poaching liquid and the Frangelico, (Here is where you can reduce the amount of poaching liquid you add, and increase the amount of Frangelico).

6. Put the mixture into your ice cream maker and freeze according to its instructions. Put the sorbet in the freezer to set, but not for more than an hour or two. Longer than this and you risk it freezing into a solid block.

7. Save the remaining poaching liquid, and use if for something else (it is delicious). In the cake bible, there is a recipe for making pear pastry cream using this type of poaching liquid.

Tuesday, October 14, 2008

Peanut Butter Swirl Brownies

I made these brownies to bring to a friend’s football party. The recipe comes from Martha Stewart’s Cookie Book. I’ve got to say, I’ve made a lot of recipes from this book now, and I think they’ve all turned out well. This book is definitely worth the investment if you’re interested in some pretty straightforward baking.

 I used my baker’s edge pan to make these, which is why the pan in the pictures looks a little odd. I did end up with brownies that were all edge pieces though.

Peanut Butter Swirl Brownies

Makes an 8x8 pan

For the Batter:

½ cup (1 stick) unsalted butter cut into small pieces 
2 oz. unsweetened chocolate, coarsely chopped 
4 oz. semisweet chocolate, coarsely chopped 
2/3 cup AP flour 
½ tsp baking powder 
¼ tsp coarse salt 
¾ cup sugar 
3 large eggs 
2 tsp vanilla extract

For the filling

4 tablespoons (1/2 stick) unsalted butter, melted 
½ cup confectioner’s sugar 
¾ cup smooth peanut butter 
¼ tsp salt 
½ tsp vanilla extract

1. Preheat oven to 325 degrees. Butter an 8x8 baking pan and line with parchment, allowing a 2-inch overhand. Butter the lining.

2. Melt the chocolate and butter in a heat proof bowl. Stir until smooth. In a separate bowl whisk together the flour, baking powder, and salt.

3. Whisk the sugar into the chocolate mixture. Add eggs and mix until smooth. Stir in the vanilla

. Add the flour mixture; stir well until combined.

4. Stir together all the ingredients for the filling in a separate bowl.

5. Pour 1/3 of the batter in the baking pan. Put tablespoons of the peanut butter filling on the batter, spread about an inch apart.

6.  Pour the remaining batter over the top, and smooth with a spatula.

7. To make the swirl pattern, place dollops of the remaining peanut butter mixture on top of the brownie batter. Drag a butter knife back and forth through the brownies and peanut butter to create a swirl pattern (see the pictures).

Sunday, October 12, 2008

Butternut Squash Lasagna


As part of the dinner party of the disastrous doughnut adventure (see my previous post) I also made an entrée. Unlike the doughnuts, this was delicious. I based my lasagna on a recipe from epicurious, but I tweaked it significantly, mostly in adjusted the béchamel. I added a number of cloves of roasted garlic to the sauce, as well as a few other spices to give it kick. I also made one and a half times the original recipe for the sauce, as the comments suggested that the recipe as written didn’t provide enough. I had more than enough sauce making one and a half times the original, but the leftover is sitting in my fridge waiting to adorn a sandwich, so I’m certainly not considering it a waste.

Butternut squash, hazelnut, and roasted garlic lasagna

Makes on 9 x 13 dish

For squash filling
1 large onion, chopped
3 tablespoons unsalted butter
3 lb butternut squash, peeled, seeded, and cut into 1/2-inch pieces
1 teaspoon minced garlic
1 teaspoon salt
1/4 teaspoon white pepper
2 tablespoons chopped fresh flat-leaf parsley
4 teaspoons chopped fresh sage
1 cup hazelnuts (4 oz), toasted, loose skins rubbed off with a kitchen towel, and coarsely chopped

For sauce

1 teaspoon minced garlic
4 1/2 tablespoons unsalted butter
7 1/2 tablespoons all-purpose flour
1 1/2 cups milk 
5 cloves roasted garlic
2 bay leaves (not California) 
1 1/2 teaspoon salt
1/4 teaspoon white pepper 
½ teaspoon smoked paprika 
½ teaspoon nutmeg 
Cayenne Pepper to taste

For assembling lasagne

¾  lb fresh mozzarella, coarsely grated (2 cups) 
1 cup finely grated Parmigiano-Reggiano (3 oz)  
5 oz. Goat cheese, crumbled
12 (7- by 3 1/2-inch) sheets no-boil lasagne (1/2 lb)

1. Preheat oven to 425 degrees. Sauté the onion in the butter until golden, about 10 minutes. Add the garlic, pepper, salt and the squash and sauté until squash is tender, 15-20 minutes. Put in a bowl and mix with the sage, parsley and nuts. Set aside.

2. Over medium heat melt the butter with the garlic and cook for one minute. Add the flour and whisk the roux for three minutes. Add the milk in a slow stream, whisking constantly. Turn the heat up to medium high, continue whisking. Let the milk come to a boil, and reduce the heat until the milk is just at a simmer. Add the roasted garlic and the remaining spices. Continue cooking, whisking constantly and being sure to scrape the bottom, for another 10 minutes.

3. Mix the parmesian, mozzarella, and goat cheese in a bowl. Pour ½ cup of the béchamel sauce into the bottom of a buttered, 9 x 13 baking dish. Place three noodles over the sauce, leaving spaces between them. Pour an additional 2/3 of a cup of the sauce over the noodles. Spread 1/3 of the filling over the sauce. Spread a quarter of the cheese mixture over the filling. Repeat the process two more times, beginning with the noodles. Once you have three layers, top the lasagna with the remaining three noodles. Cover the noodles in sauce (I would not recommend using the entire remainder, but feel free to be generous. Top the lasagna with the remaining cheese. At this point the lasagna can be refrigerated if not being used immediately.

4. Cover the lasagna with foil and put it in the oven for 30 minutes. Remove the foil and cook for another 10 minutes, or until cheese is bubbly. Serve hot.

Thursday, October 9, 2008

I'm Going to Pretend These were Supposed to be Fritters


One of my favorite memories from childhood is Christmas morning. Every Christmas morning, before I would get up, my mom would get up and make a batch of doughnuts. We weren’t a big fried foods family, so these were a wonderful treat. They were airy and sugary and chocolaty, generally wonderful. No donut I’ve had elsewhere (I admittedly do not go seeking doughnuts) has ever compared. This summer my mom decided to get rid of her deep fryer, since she hadn’t used it in years, and so I took it.

I should say, prior to this I have never tried to deep fry anything. This is for a number of reasons: first there is of course the health concern, deep fried food is bad for you, and getting into the habit of making it seems risky. There’s also something inherently frightening to me about oil heated above water’s boiling point. Isn’t this what they used to defend castles in the Middle Ages? Nonetheless, I decided to overcome my hesitations and attempt to make doughnuts.

At first I was only going to make one type of doughnut, and it being autumn I settled on apple cider doughnuts, a recipe for which had just gone up on Coconut and Lime. I made the dough, set it aside to rise, and went about my other business. But when I came back an hour and a half later, the dough hadn’t risen at all! Running low on time, I decided to try two things, to make a new batch of the cider doughnut dough, and a dough for chocolate doughnuts, which I found here. Unfortunately, there wasn’t enough time between when I started and when my guests arrived for either recipe. So I made each of them, and gave them as much time as I good (the chocolate dough ended up in the freezer to cool). What I definitely didn’t have time to do was to roll out and cut the doughnuts, and in the case of the apple doughnuts, to let them have a second rise (I really didn’t get much of a first). Instead I just used two spoons to get out little balls of dough, which I gently dropped into the hot oil. For those of you who don’t know, this is immensely stupid. When dealing with hot oil, you do NOT want to drop things in, as you risk splashing hot oil out of the fryer. Fortunately, I was able to minimize my burns, but I highly recommend that you be careful, and be sure to wear shoes (that oil that misses your hands is still heading down towards your feet). This technique worked fine for the apple doughnuts, which really just ended up resembling apple fritters. It did not seem to work at all for the chocolate doughnuts, some of which stayed together, others of which literally boiled themselves apart into little pieces of doughnut shrapnel floating in my hot oil.

Anyway, when all was said and done I had apple fritters. I coated them very lightly in a mix of powdered sugar and cinnamon, and served them. I can’t comment on the texture of the recipe as it was intended, but I thought my fritters were good, if not a little too doughy. As for flavor, they tasted like lightly sweetened, fried dough. I really didn’t think the apple came through as anything more than a hint, and even that might have depended on my knowing it was there.

Since these recipes were not my own, and I didn’t make them particularly successfully, I’ve decided not to repost them here. However, the links to both recipes are below if you are interested in making your own attempts (these bloggers clearly had more success than I did). Maybe I’ll try again someday with my Mom’s old recipes and a little more time.

Coconut and Lime’s Apple Cider Doughnuts

Use Real Butter’s Chocolate Doughnuts