Wednesday, October 29, 2008

Just in Time for Halloween

I made these truffles for a Halloween party. As far as ingredients go, these are super easy to make, although the process of making them is a little time consuming (you need to leave time of chocolate to set at various points). The end result is something that looks neat, and tastes good (after all it is a truffle). For the veins and pupils I just used Betty Crocker, because it didn’t seem worthwhile to make my own. I also didn’t bother to temper the white chocolate I used in this recipe, but it wouldn’t be a bad idea if you know how to do it.

Eyeball Truffles

12 oz. semisweet chocolate chips 
2/3 cup heavy cream
8 oz. white chocolate
M&Ms 
Red and Black frostings

1. Pour the chocolate chips into a bowl. Put the cream in a sauce pan over medium high heat. Heat the cream until bubbles just begin to form around the edges.

2. Pour the heated cream over the chocolate. Let sit for 30 seconds, then begin whisking. Whisk until the ganache is uniform. Refrigerate until the ganache is firm enough to roll.

3. Roll tablespoons of ganache into balls. I do this by rolling the chocolate in my hands, but if you prefer you can use spoons. Put the rolled out truffles on a cookie sheet and refrigerate until cold.

4. While the truffles are chilling put the white chocolate in the bowl of a double boiler. Melt the chocolate, then remove it from the heat.

5. Getting the right balance here is the hard part, if you put the truffles into the white chocolate while it’s too hot, it will melt them, if the chocolate is too cold it won’t smooth out. I would recommend waiting until the white chocolate is just slightly above room temperature, but that’s an estimate.

6. Drop a truffle center into the white chocolate, using a fork quickly roll the truffle in the white chocolate so that it is completely covered, and then remove the truffle from the chocolate and put it on the baking sheet. Immediately push an M&M into the white chocolate. Repeat this until all truffles are dipped.

7. Pipe red frosting onto the truffles as veins, pipe black frosting onto the centers of the M&Ms for pupils. Store in an airtight container.

Sunday, October 26, 2008

Double Pumpkin Pie Cupcakes


It looks like I’ve finally got a recipe ready to get in before this month’s cupcake hero. This month’s theme was squash, a suitable fall theme, and I decided to go with Pumpkin (like pretty much everyone else). Finding inspiration for these cupcakes was easy. Every Thanksgiving my mother makes a pumpkin pie that has a layer of pecan-praline at the bottom, and it is delicious, and the inspiration for these cupcakes. These are pumpkin cupcakes, filled with pumpkin pie, and frosted with a cream cheese frosting flavored with pecan-praline powder and maple syrup. The result was delicious. When I served these last night a number of people told me that these were the best cupcakes I’ve made yet, and while I don’t know that I agree (I find it hard to accept anything without chocolate in it as a “best”), they were certainly very good. At least one person said the cupcakes reminded him of cheesecake, probably because of the cream cheese frosting. This is also one of the only times where I’ve ended up with the right amount of everything (I usually end up with too much or not enough of some part of the cake, like the filling or the frosting)

A note on the frosting: it is not nearly stiff enough to be piped as written. You could probably solve this problem by adding powdered sugar, but I wanted the sweetness to come from the praline and the maple syrup more than I wanted a pipe-able frosting.

Pumpkin Pie Filling

Makes 1 8x8 pan

1 (15 oz.) can pumpkin puree
1 (14 oz.) can sweetened condensed milk
2 eggs, separated
1 tsp cinnamon
½ tsp ground ginger
½ tsp fresh grated nutmeg
½ tsp salt

1. Preheat the oven to 425. You will not bake the pie at this temperature, but do want a hot oven. In a large bowl whisk together the pumpkin puree, the sweetened condensed milk, and the egg yolks.

2. Whisk in the cinnamon, ginger, nutmeg, and salt.

3. In a separate bowl, whip the egg whites to soft peaks. Gently fold the egg whites into the pumpkin mixture.

4. Pour the filling into an 8x8 baking pan (I used Pyrex). Reduce the oven temperature to 375 degrees. Bake the filling until it has set, about 40 minutes. Remove from the oven and let cool fully. While the filling is baking, prepare the other parts of the cupcakes.

Pumpkin Cupcakes (recipe from marthastewart.com)

Makes 24 cupcakes


2 cups all-purpose flour
1 teaspoon baking soda
1 teaspoon baking powder
1 teaspoon coarse salt
1 teaspoon ground cinnamon
1 teaspoon ground ginger
1/4 teaspoon freshly grated nutmeg
1 cup packed light-brown sugar
1 cup granulated sugar
1 cup (2 sticks) unsalted butter, melted and cooled
4 large eggs, lightly beaten1 can (15 ounces) pumpkin puree

1. Reduce the oven temperature to 350 degrees. In a medium bowl whisk together the flour, baking soda, baking powder, salt, cinnamon, ginger, and nutmeg. In a separate bowl whisk together the sugars, the butter, and the eggs.

2. Mix the dry ingredients into the wet. Once they are fully combined, mix in the pumpkin puree.

3. Fill cupcake liners 2/3 full using a ¼ cup measure. Bake the cupcakes for 20-25 minutes, or until a tester comes out clean. Remove from the oven and let cool completely.

Praline Powder

Makes 2 ½ - 3 cups

1 ½ cups sugar
6 T water
1 cup pecan halves

1. Put the water and sugar in a heavy bottomed sauce pan over medium high heat. Stir briefly so that the sugar is mixed with the water.

2. Let the mixture come to a boil. Continue heating. Eventually the mixture should begin turning an amber color. When the mixture reaches a light to medium amber (around 300 degrees on a candy thermometer) remove the mixture from the heat. Immediately pour the nuts into the caramel and shake to combine.

3. Pour the caramel onto an oiled cookie sheet or a silpat. Set aside and let cool and harden (this won’t take too long).

4. Once the praline has hardened, break it into chunks and put it into a food processor. Use the food processor to grind the praline powder until it resembles a coarse sand.

Maple – Praline Frosting

8 oz. Cream Cheese, softened
4 T unsalted butter, softened
2 cups praline powder
½ cup maple syrup (Grade B)
½ cup powdered sugar

1. Beat together the cream cheese and butter until creamy. Beat in the praline powder, maple syrup, and powdered sugar.

Assembly

1. Use the cone method to hollow out the cupcakes.

2. Spoon a healthy amount of pie filling into each cupcake. Place the top back onto the cupcake.

3. Frost with the Maple – Praline Frosting.

4. Keep refrigerated until ready to serve.

Tuesday, October 21, 2008

Pear Sorbet


It’s been a little while since my last update. I can’t claim any particular excuse, I just didn’t around the making anything, or posting anything. I actually made this sorbet about a week ago, it just took me a long time to put it up.

I got the recipe for this pear sorbet from Vanilla Garlic. I changed it a little by cutting the sugar, and replacing some of the pear syrup with Frangelico, but I only used a few tablespoons, which wasn’t enough to make a difference in the flavor, or how it froze. I think the addition is a good idea though, so I would suggest upping the Frangelico if you try this.

Pear Sorbet

Makes ~1 quart

6 Bartlett Pears 
1 vanilla bean 
3 cups sugar 
4 strips of lemon zest 
6 cups of water 
2 Tbs Frangelico

1. Use a vegetable peeler to strip 5 strips of zest off of a lemon. Combine the lemon zest, sugar, and water in a large pot. Cut the vanilla bean in half and scrape the seeds into the water, add the bean.

2. Put the pot on the heat and bring the water up to a boil so that the sugar has dissolved. Reduce the heat to medium.

3. Peal the pears and cut off the bottoms so that they can stand up. Put the pears in the poaching liquid for at least 10 minutes.

4. Remove the pears from water one at a time (do not discard the poaching liquid). Cut the meat from each pear, discarding the stem and core. Put the pears into a food processor or large blender.

5. Puree the pears with 2 cups of the poaching liquid and the Frangelico, (Here is where you can reduce the amount of poaching liquid you add, and increase the amount of Frangelico).

6. Put the mixture into your ice cream maker and freeze according to its instructions. Put the sorbet in the freezer to set, but not for more than an hour or two. Longer than this and you risk it freezing into a solid block.

7. Save the remaining poaching liquid, and use if for something else (it is delicious). In the cake bible, there is a recipe for making pear pastry cream using this type of poaching liquid.

Tuesday, October 14, 2008

Peanut Butter Swirl Brownies

I made these brownies to bring to a friend’s football party. The recipe comes from Martha Stewart’s Cookie Book. I’ve got to say, I’ve made a lot of recipes from this book now, and I think they’ve all turned out well. This book is definitely worth the investment if you’re interested in some pretty straightforward baking.

 I used my baker’s edge pan to make these, which is why the pan in the pictures looks a little odd. I did end up with brownies that were all edge pieces though.

Peanut Butter Swirl Brownies

Makes an 8x8 pan

For the Batter:

½ cup (1 stick) unsalted butter cut into small pieces 
2 oz. unsweetened chocolate, coarsely chopped 
4 oz. semisweet chocolate, coarsely chopped 
2/3 cup AP flour 
½ tsp baking powder 
¼ tsp coarse salt 
¾ cup sugar 
3 large eggs 
2 tsp vanilla extract

For the filling

4 tablespoons (1/2 stick) unsalted butter, melted 
½ cup confectioner’s sugar 
¾ cup smooth peanut butter 
¼ tsp salt 
½ tsp vanilla extract

1. Preheat oven to 325 degrees. Butter an 8x8 baking pan and line with parchment, allowing a 2-inch overhand. Butter the lining.

2. Melt the chocolate and butter in a heat proof bowl. Stir until smooth. In a separate bowl whisk together the flour, baking powder, and salt.

3. Whisk the sugar into the chocolate mixture. Add eggs and mix until smooth. Stir in the vanilla

. Add the flour mixture; stir well until combined.

4. Stir together all the ingredients for the filling in a separate bowl.

5. Pour 1/3 of the batter in the baking pan. Put tablespoons of the peanut butter filling on the batter, spread about an inch apart.

6.  Pour the remaining batter over the top, and smooth with a spatula.

7. To make the swirl pattern, place dollops of the remaining peanut butter mixture on top of the brownie batter. Drag a butter knife back and forth through the brownies and peanut butter to create a swirl pattern (see the pictures).

Sunday, October 12, 2008

Butternut Squash Lasagna


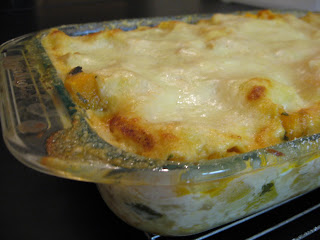
As part of the dinner party of the disastrous doughnut adventure (see my previous post) I also made an entrée. Unlike the doughnuts, this was delicious. I based my lasagna on a recipe from epicurious, but I tweaked it significantly, mostly in adjusted the béchamel. I added a number of cloves of roasted garlic to the sauce, as well as a few other spices to give it kick. I also made one and a half times the original recipe for the sauce, as the comments suggested that the recipe as written didn’t provide enough. I had more than enough sauce making one and a half times the original, but the leftover is sitting in my fridge waiting to adorn a sandwich, so I’m certainly not considering it a waste.

Butternut squash, hazelnut, and roasted garlic lasagna

Makes on 9 x 13 dish

For squash filling
1 large onion, chopped
3 tablespoons unsalted butter
3 lb butternut squash, peeled, seeded, and cut into 1/2-inch pieces
1 teaspoon minced garlic
1 teaspoon salt
1/4 teaspoon white pepper
2 tablespoons chopped fresh flat-leaf parsley
4 teaspoons chopped fresh sage
1 cup hazelnuts (4 oz), toasted, loose skins rubbed off with a kitchen towel, and coarsely chopped

For sauce

1 teaspoon minced garlic
4 1/2 tablespoons unsalted butter
7 1/2 tablespoons all-purpose flour
1 1/2 cups milk 
5 cloves roasted garlic
2 bay leaves (not California) 
1 1/2 teaspoon salt
1/4 teaspoon white pepper 
½ teaspoon smoked paprika 
½ teaspoon nutmeg 
Cayenne Pepper to taste

For assembling lasagne

¾  lb fresh mozzarella, coarsely grated (2 cups) 
1 cup finely grated Parmigiano-Reggiano (3 oz)  
5 oz. Goat cheese, crumbled
12 (7- by 3 1/2-inch) sheets no-boil lasagne (1/2 lb)

1. Preheat oven to 425 degrees. Sauté the onion in the butter until golden, about 10 minutes. Add the garlic, pepper, salt and the squash and sauté until squash is tender, 15-20 minutes. Put in a bowl and mix with the sage, parsley and nuts. Set aside.

2. Over medium heat melt the butter with the garlic and cook for one minute. Add the flour and whisk the roux for three minutes. Add the milk in a slow stream, whisking constantly. Turn the heat up to medium high, continue whisking. Let the milk come to a boil, and reduce the heat until the milk is just at a simmer. Add the roasted garlic and the remaining spices. Continue cooking, whisking constantly and being sure to scrape the bottom, for another 10 minutes.

3. Mix the parmesian, mozzarella, and goat cheese in a bowl. Pour ½ cup of the béchamel sauce into the bottom of a buttered, 9 x 13 baking dish. Place three noodles over the sauce, leaving spaces between them. Pour an additional 2/3 of a cup of the sauce over the noodles. Spread 1/3 of the filling over the sauce. Spread a quarter of the cheese mixture over the filling. Repeat the process two more times, beginning with the noodles. Once you have three layers, top the lasagna with the remaining three noodles. Cover the noodles in sauce (I would not recommend using the entire remainder, but feel free to be generous. Top the lasagna with the remaining cheese. At this point the lasagna can be refrigerated if not being used immediately.

4. Cover the lasagna with foil and put it in the oven for 30 minutes. Remove the foil and cook for another 10 minutes, or until cheese is bubbly. Serve hot.

Thursday, October 9, 2008

I'm Going to Pretend These were Supposed to be Fritters


One of my favorite memories from childhood is Christmas morning. Every Christmas morning, before I would get up, my mom would get up and make a batch of doughnuts. We weren’t a big fried foods family, so these were a wonderful treat. They were airy and sugary and chocolaty, generally wonderful. No donut I’ve had elsewhere (I admittedly do not go seeking doughnuts) has ever compared. This summer my mom decided to get rid of her deep fryer, since she hadn’t used it in years, and so I took it.

I should say, prior to this I have never tried to deep fry anything. This is for a number of reasons: first there is of course the health concern, deep fried food is bad for you, and getting into the habit of making it seems risky. There’s also something inherently frightening to me about oil heated above water’s boiling point. Isn’t this what they used to defend castles in the Middle Ages? Nonetheless, I decided to overcome my hesitations and attempt to make doughnuts.

At first I was only going to make one type of doughnut, and it being autumn I settled on apple cider doughnuts, a recipe for which had just gone up on Coconut and Lime. I made the dough, set it aside to rise, and went about my other business. But when I came back an hour and a half later, the dough hadn’t risen at all! Running low on time, I decided to try two things, to make a new batch of the cider doughnut dough, and a dough for chocolate doughnuts, which I found here. Unfortunately, there wasn’t enough time between when I started and when my guests arrived for either recipe. So I made each of them, and gave them as much time as I good (the chocolate dough ended up in the freezer to cool). What I definitely didn’t have time to do was to roll out and cut the doughnuts, and in the case of the apple doughnuts, to let them have a second rise (I really didn’t get much of a first). Instead I just used two spoons to get out little balls of dough, which I gently dropped into the hot oil. For those of you who don’t know, this is immensely stupid. When dealing with hot oil, you do NOT want to drop things in, as you risk splashing hot oil out of the fryer. Fortunately, I was able to minimize my burns, but I highly recommend that you be careful, and be sure to wear shoes (that oil that misses your hands is still heading down towards your feet). This technique worked fine for the apple doughnuts, which really just ended up resembling apple fritters. It did not seem to work at all for the chocolate doughnuts, some of which stayed together, others of which literally boiled themselves apart into little pieces of doughnut shrapnel floating in my hot oil.

Anyway, when all was said and done I had apple fritters. I coated them very lightly in a mix of powdered sugar and cinnamon, and served them. I can’t comment on the texture of the recipe as it was intended, but I thought my fritters were good, if not a little too doughy. As for flavor, they tasted like lightly sweetened, fried dough. I really didn’t think the apple came through as anything more than a hint, and even that might have depended on my knowing it was there.

Since these recipes were not my own, and I didn’t make them particularly successfully, I’ve decided not to repost them here. However, the links to both recipes are below if you are interested in making your own attempts (these bloggers clearly had more success than I did). Maybe I’ll try again someday with my Mom’s old recipes and a little more time.

Coconut and Lime’s Apple Cider Doughnuts

Use Real Butter’s Chocolate Doughnuts

Monday, October 6, 2008

Chocolate Amarula Cupcakes


Having bought myself some Amarula to make the last batch of cupcakes, I felt compelled to use it again in something. This time I decided to try Warren Brown’s chocolate butter cake recipe with amarula. I thought the cocoa and the Amarula would pair together well. Again, the flavor of the Amarula was subsumed by the chocolate, but I also included some amarula in the frosting, which helped to bring out the flavor. The frosting was a chocolate buttercream with cinnamon and Amarula, it was good, very fudgy. I also made these cupcakes mini, mostly to match the others.

Chocolate Amarula Mini Cupakes

Makes ~44

3 ½ oz. AP flour (1/2 cups + 2 T)
1 oz. Cocoa Powder
¾ tsp baking powder
½ tsp salt ½ cup + 1
T Amarula
1 T Vanilla Extract
3 oz. (6 T) unsalted butter, softened
7 oz. Superfine Sugar (3/4 cups + 1 Tbs)
2 eggs

1. Preheat the oven to 350 degrees. Sift together the flour, potato starch, baking powder and salt, and set aside. In a small bowl or cup whisk together the Amarula and vanilla and set aside.

2. Put the butter and sugar in the bowl of a standing mixer. Cream together at low speed for 5 minutes, scrape down the sides of the bowl.

3. Add the eggs one at a time, scrape down the sides of the bowl.

4. Add 1/3 of the flour mixture, followed by ½ of the Amarula, continue alternating between the two until both are fully added, ending with the flour. Do NOT wait until each addition is completely mixed to add the next amount. Once everything is added beat on medium speed for 1 minute to combine. At this point, if you let the batter sit, it may look like it’s separating, just fold it with a spatula if/when this happens

4. Fill the cupcake liners 2/3 full, and bake for 10-12 minutes, or until a tester comes out clean. Let cool completely

Chocolate-Amarula-Cinnamon Buttercream

1 cup (2 sticks) unsalted butter, softened
3 cups powdered sugar
½ cup cocoa powder
¼ Amarula
1 T cinnamon

1. Using a standing mixer with the paddle attachment, cream the butter. Add one cup of the sugar, and beat to combine.

2. Add the cocoa powder, Amarula and Cinnamon, beat to combine. Add the remaining sugar and combine. You may need to add more sugar or amarula to stiffen or soften the frosting as necessary.

Friday, October 3, 2008

Not Just an Antelope


A few years ago I was introduced to Amarula, a South African fruit-cream drink. I’m not a big drinker, but this stuff I liked. At the same time I was introduced to a shot called a Springbok (A Springbok is also a type of African Antelope), which is a combination of Amarula and Crème de Menthe. It was dangerously good. I used that shot as an inspiration for this cupcake, which has an Amarula cake base, and a mint whipped cream frosting. I made these cupcakes miniature because that struck me as being more like a shot.

My original plan for these cupcakes was to frost them with a white chocolate / crème de menthe mousse. I tried two different methods for making this, and both of them curdled promptly. Something about combining the crème de menthe and the whipped cream did not go well. I eventually just settled on the whipped cream. If anyone knows what happened to my mousse, I would be happy to learn.

I based the cake on the Yellow Butter Cake recipe from CakeLove by Warren Brown. That of course meant that it was back to scales for measuring out my ingredients. I also cut the recipe in the book in half, which I have done here as well.

People really liked these cupcakes. The Amarula flavor was a lot stronger in the batter than it was in the final cupcakes, but it still added a nice subtlety to the final product.

Amarula Mini-Cupcakes

Makes ~44

3 ½ oz. AP flour (1/2 cups + 2 T)
1 oz. Potato Starch
¾ tsp baking powder
½ tsp salt
½ cup + 1 T Amarula
1 T Vanilla Extract
3 oz. (6 T) unsalted butter, softened 7
oz. Superfine Sugar (3/4 cups + 1 Tbs)
2 eggs

1. Preheat the oven to 350 degrees. Sift together the flour, potato starch, baking powder and salt, and set aside. In a small bowl or cup whisk together the Amarula and vanilla and set aside.

2. Put the butter and sugar in the bowl of a standing mixer. Cream together at low speed for 5 minutes, scrape down the sides of the bowl.

3. Add the eggs one at a time, scrape down the sides of the bowl.

4. Add 1/3 of the flour mixture, followed by ½ of the Amarula, continue alternating between the two until both are fully added, ending with the flour. Do NOT wait until each addition is completely mixed to add the next amount. Once everything is added beat on medium speed for 1 minute to combine. At this point, if you let the batter sit, it may look like it’s separating, just fold it with a spatula if/when this happens

4. Fill the cupcake liners 2/3 full, and bake for 10-12 minutes, or until a tester comes out clean. Let cool completely

Mint Whipped Cream

2 cups heavy cream, chilled
1 1/3 cups powdered sugar
½ tsp peppermint extract
Green food coloring

1. In a standing mixer with the whisk attachment, beat the whipped cream until soft peaks form. Add the powdered sugar, peppermint extract, and green food coloring, and beat until stiff peaks form.