Showing posts with label Chocolate. Show all posts

Saturday, July 10, 2010

Pretty Girl Makes Cupcakes

Hi everyone. Good news, I’m neither dead, nor retired from blogging. It’s just been a busy few months, and I haven’t had the time / energy to do much baking, and even less to do posting. Since my last post I’ve graduated from law school (hooray), started studying for the bar exam (boooo), and have started packing for a move to DC at the end of the summer. All in all, a busy time. Because of the bar don't expect many, or even any, new posts for awhile, but I thought I'd try for at least this one update.

This weekend though, I was fortunate enough to have a pretty girl help me make cupcakes (hence the title of the post). Hattie (the aforementioned pretty girl) and I made Chocolate-Banana-Peanut butter cupcakes for a Fourth of July party. These aren’t exactly new for me, as I’ve done a pretty fair number of chocolate peanut butter desserts, but I thought the addition of banana made these excellent. The cake is my basic chocolate, filled with a chocolate banana ganache, and frosted with a peanut butter frosting. The combination was excellent, if I can say so, and the banana really came through as a flavor in the ganache, even though you wouldn't suspect it (it just has the texture and appearance of regular whipped ganache).

Chocolate Cupcakes

Makes ~26

2 sticks unsalted butter
½ cup cocoa-powder
¾ cup water
2 cups sugar
2 eggs
½ cup well-shaken buttermilk
1 T vanilla
2 cups flour
1 tsp baking soda
1 t cinnamon
¼ tsp salt

1. Preheat oven to 350. Sift together the flour, baking soda, cinnamon and salt.

2. Melt the butter in a heavy bottomed sauce pan over low heat. Add in the cocoa powder and whisk until smooth. Then add the water and mix until smooth again. Remove from heat

3. One at a time mix in the sugar, egg, buttermilk, and vanilla

4. Sift the dry ingredients over the wet, and whisk until well combined.

5. Fill cupcakes using a ¼ cup measure. Bake for about 18-20 minutes, or until a tester comes out clean. Let them cool thoroughly before frosting.

Chocolate-banana ganache

8 oz. dark chocolate
½ cup heavy cream
½ cup banana puree

1. Chop the chocolate, and place it in a heat proof bowl.

2. Bring the cream to a simmer, pour over the chocolate, allow to sit for a minute, then stir until fully combined.

3. Stir in the banana puree. Allow to cool until set.

4. Pour cooled ganache into the bowl of a mixer, beat with whisk attachment until light in color and fluffy

Peanut Butter frosting

1 cup peanut butter
4 oz cream cheese, softened
1 ½ cups whipped cream (from about 1 cup cream)
1 cup powdered sugar
½ cup banana puree

1. Beat together the peanut butter, cream cheese, and powdered sugar until smooth.

2. Add the whipped cream and beat to combine. Beat in the banana puree.

Assembly

Use the cone method to fill the cupcakes with the whipped ganache. Top with the peanut butter frosting.


Thursday, April 15, 2010

Cookie Dough Cake and Turning Two

It’s the second anniversary of my creating this blog and it’s been an interesting experience running the site for the past two years. Originally my intention was at most to document for my own purposes and reference the things I had made. But having the blog changed the way I cook and bake. The need for posts, especially early on, drove me to more cooking and baking that I might otherwise do. It also drove me to push my own limits, if only to keep what I had to write about interesting. It’s also encouraged me to experiment. I can’t post about recipes I’ve made before, and so I have to keep pushing for new things. While this means that I don’t return too much (there are a few, like the tiramisu cupcakes, or the double pumpkin cupcakes, that I will come back to over and over), it also means I keep looking for new things to try. It also just seems boring to make other people’s recipes, I can review them I suppose, and sometimes I do, but at the same time I feel like that’s not adding anything. I’d rather try to make a snickers bar cupcake, or one with candied prosciutto in it, than just making the same old thing. And while I am far from the most creative person out there, I like to at least think I’ve done a few things that if nothing else, no one else has bothered doing, at least in the same way I have.

Interestingly, running the blog has also been an interesting way for me to catalogue my own life. A friend of mine recently went through the blog and made a slideshow of all of the best pictures on the website (I know they’re not all winners). I remembered each baked good, both what I was seeing, as well as what I had made them for, the various parties, potlucks, events, and tribulations of law school over the past two years since starting Amicus Cupcake. And while I don’t tend to add the kinds of persona vignettes that many other bloggers do, for me at least the pictures and the recipes act as triggers of memory far more extensive than what is written.

I know that of course my blogging has slowed down lately. When I was celebrating my 1 year blogoversary, I was also celebrating my 100th post. Now I’m only remarking my 136th, certainly a nearly 2/3 reduction in postings is noteworthy, but it’s just been necessitated by my life. When I do repeat recipes, I don’t have anything to write. Sometimes I don’t have time to take pictures between baking and serving, which means no blog posting. Law school also just takes a lot of time and energy, and I often just don’t feel like writing up my recipes. Last, and probably most important, has been a change in the way I bake. In an effort to eat healthier I’ve instituted personal rules on when I bake, most notably I only bake when I have a good reason, and a way to get rid of it (without eating it all myself). The consequence is less baking, but a healthier me. I think it’s been a fair tradeoff.

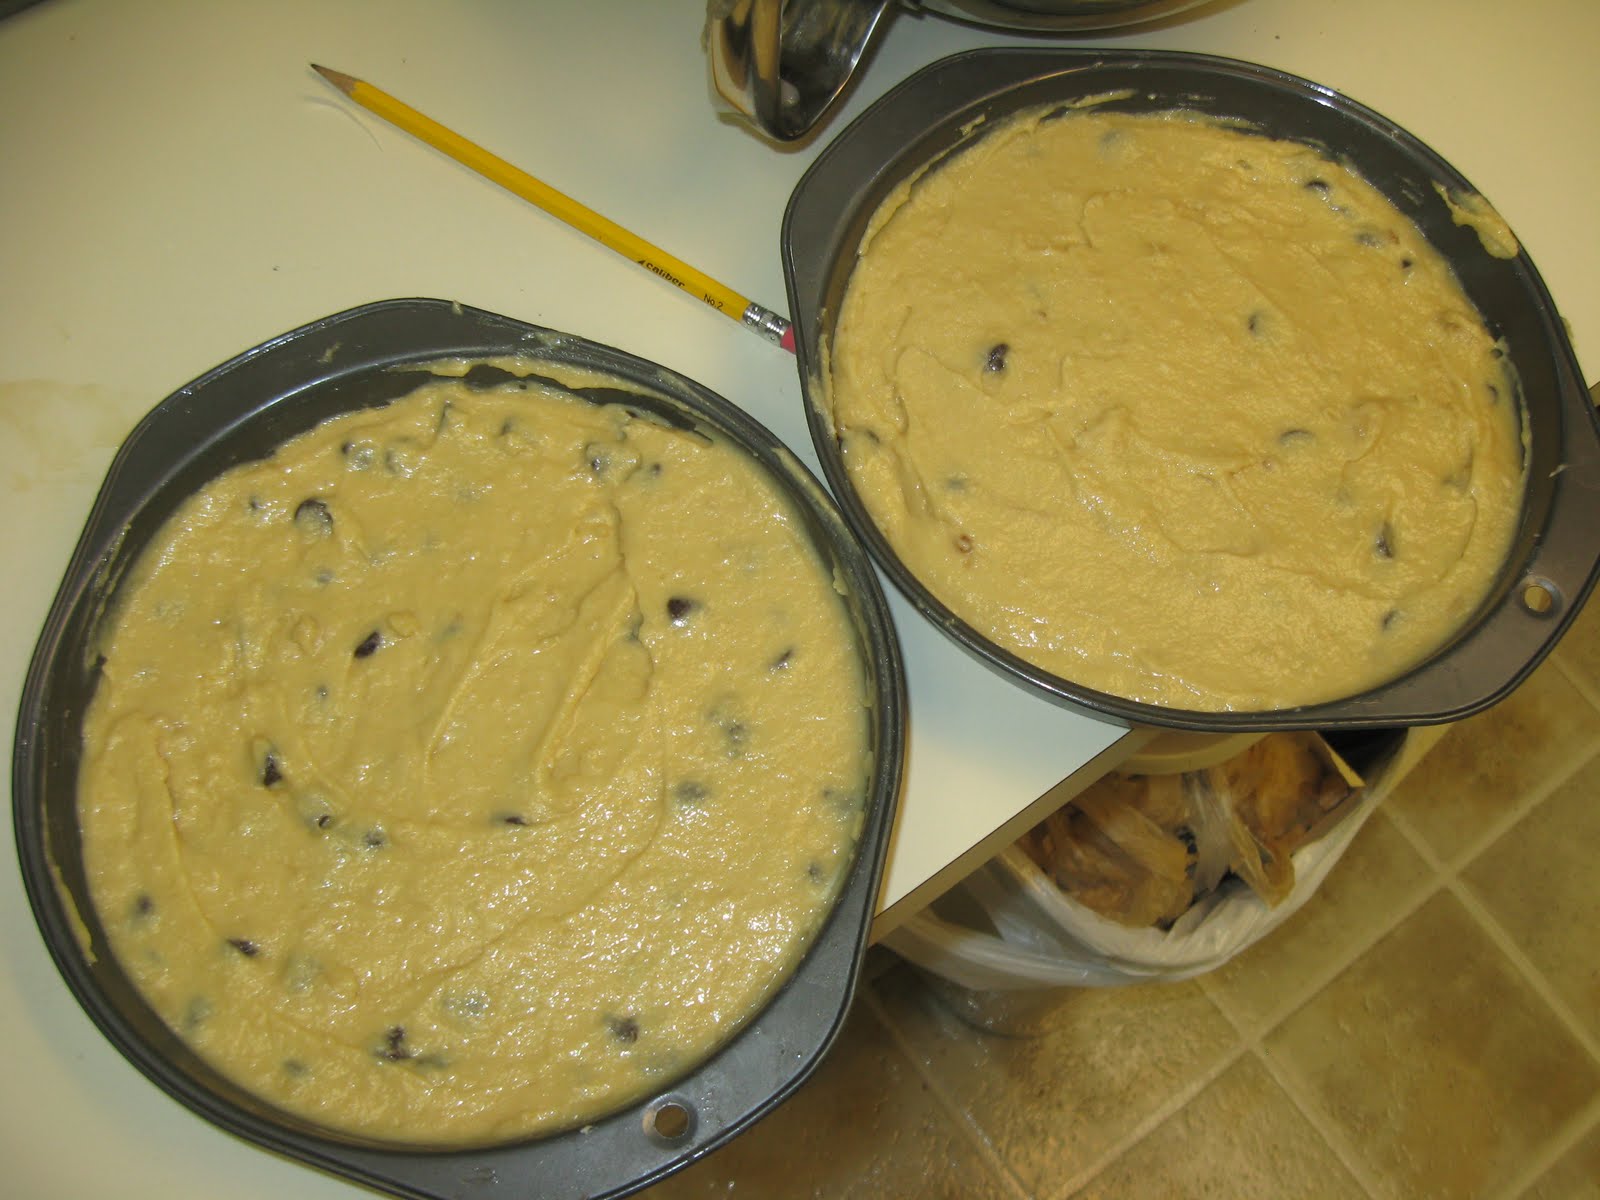
Now on to the cake! Earlier this month Annie of Annie’s Eats posted a recipe for cookie dough cupcakes. I’m always a sucker for cookie dough, and so I decided to turn it into a layer cake. The recipe, however, looked a little off to me, and so I went to Bakewise and made a few changes. Namely I reduced the amount of butter (3 sticks seem like a lot for 2 cake layers), reducing the milk, and increasing the sugar. As a result, I can’t actually comment on Annie’s version of the recipe.

That disclaimer aside, I thought this cake was really good, but very dense and rich. The layers of cake were thick, and had a texture that reminded me of pound cake. The edges of the cake were a little overcooked, making the cake harder to cut through, but it didn’t mess up the taste. I would say overall the layers reminded me of cookies. The cookie dough filling itself was great. At first I thought that it tasted too much like sweetened condensed milk, but after a night in the fridge the tastes mellowed and it made an excellent cookie dough substitute. As for the frosting, I omitted the flour to make it lighter, and also took out some of the sugar, because I tend to think buttercreams just have too much sugar in them. I thought the light frosting went well with the heavier cake and filling though.

Cookie Dough Cake

Makes 2 eight inch cake layers

1 ¼ cups (2.5 sticks) unsalted butter, at room temperature
1 2/3 cups light brown sugar, packed
4 large eggs
2 2/3 cups all-purpose flour
1 tsp. baking powder
1 tsp. baking soda
¼ tsp. salt
3/4 cup milk
2 tsp. vanilla extract
1 cup chocolate chips

1. Preheat oven to 350. Butter two 8 inch cake pans, line with parchment, and butter the parchment. Whisk the flour, salt, baking powder and baking soda together and set aside.

2. Cream together the butter and brown sugar in the bowl of a standing mixer on medium speed, until light and fluffy, about 5 minutes.

3. Add the eggs one at a time, beating well after each addition. Scrape down the sides as necessary. In a measuring cup combine the milk and the vanilla.

4. Reduce the mixer speed to slow. Add 1/3 of the flour mixture to the butter, followed by half of the milk. Continue alternating between the two, ending with the dry ingredients

5. Stir in the chocolate chips with a spatula. Divide the dough into the prepared cake pans, level off the tops of the cake batter.

6. Bake the cake layers for 30 to 32 minutes, until layers are golden on top, pulling away from the sides, and a tester comes out clean. The cakes will probably dome, mine did.

7. Remove to cooling racks and let cool. Invert to remove from pans once cooled.

Cookie Dough Filling

This makes more than enough. You can use the extra to make decorations, cookie dough truffles, or do like me and just eat it with a spoon

½ cup (1 stick) unsalted butter, room temperature
¾ cup light brown sugar, packed
2 ¼ cups AP flour
14 oz. (1 can) sweetened condensed milk
1 tsp. vanilla extract
½ cup mini chocolate chips

1. In the bowl of a standing mixer, cream together the butter and sugar until fluffy.

2. Beat in the flour, sweetened condensed milk, and vanilla until combined

3. Stir in the chocolate chips. Transfer dough to a bowl, cover in plastic wrap, and put in the fridge for several hours to firm up, or overnight

Brown sugar buttercream

This made just barely enough for me to cover the outside of the cake

1 ½ cups (3 sticks) unsalted butter, room temperature
¾ cup light brown sugar, packed
2 cups powdered sugar
1 T milk
2 ½ tsp vanilla extract
Pinch salt

1. Cream together the butter and the brown sugar until smooth. Add the powdered sugar, and beat until smooth.

2. Add the milk, vanilla, and salt and beat until combined. Add more milk (to loosen) or powdered sugar (to stiffen) to adjust the consistency as you desire.

Assembly

Cake layers
Cookie Dough Filling
Brown Sugar Buttercream
Mini Chocolate Chips

1. Line an 8 inch cake pan with plastic wrap. Press some of the cookie dough filling into the pan, until you have a disk that is 8 inches across, and ½ inch to 1 inch thick. Place in the freezer for 5-10 minutes

2. Level off the tops of the cakes, so that they are flat. Place the first layer cut side up on your serving plate.

3. Remove the cookie dough from the freezer. Remove it from the cake pan, and peel off the plastic wrap. Place the cookie dough disk upside down (flat side up) on the cake layer. If it sinks a little in the middle (mine bowed a bit), you can work the dough in your hands till it becomes putty-like, and push it into the disk to make it level.

4. Put the second cake layer on top, cut side down. Press the sides of the cake, to make sure the cookie dough layer is flush with the cake.

5. Spread about a quarter of the frosting on the cake as the crumb coat, Place in the fridge for 20 minutes.

6. Add the remaining frosting to the cake, spread evenly around the outside of the cake. Stud the cake with mini chocolate chips for decoration. Refrigerate the cake until ready to serve.


Saturday, February 6, 2010

Peppermint Cupcakes with Chocolate Mousse

I made these along with the eggnog cupcakes (I actually just divided the batter in half, and then made additions to each). I thought they were really good, and based on the rate at which they disappeared, so did the people I left the, for. On a side note, I’m aware that I’m way behind on posting at the moment (these are actually from December sometime), but if I can I’ll catch up soon. Despite the lack of posts, don’t despair, I haven’t stopped baking or cooking!

Peppermint Cupcakes

Downy Yellow Butter Cake (from the cake bible)

3 egg yolks
½ cup milk
1 ¼ tsp vanilla extract
1 ½ cups sifted cake flour
¾ cups sugar
2 tsp baking powder
¼ tsp salt
½ tsp peppermint extract
¼ cup ground peppermint candies
6 T unsalted butter, softened

1. Preheat oven to 350. In a medium bowl whisk together the egg yolks, 2 T of the milk, and the vanilla.

2. Combine the dry ingredients (including the sugar) in the bowl of a mixer, and mix on low speed for 30 seconds to blend.

3. Add the butter, the peppermint extract and remaining milk, continue mixing on low until ingredients are moistened. Fold in the ground peppermint candies. Then turn the mixer up to medium and beat for another 90 seconds.

4. Slowly add the egg mixture in thirds, beating for 20 seconds after each addition. Scrape down the sides of the bowl.

5. Fill mini-cupcake liners 2/3 full, and bake for 12-15 minutes, or until cakes are golden, and a tester comes out clean. Let cool

Chocolate mousse (from Cookwise)

2 cups heavy cream
1 1/3 cups semisweet chocolate, chopped
1 cup sugar

1. In a heavy saucepan heat the cream until you see steam.

2. Remove from heat, slowly stir in sugar. Add the chocolate, and continue stirring until it is all dissolved.

3. Refrigerate 4 hours, or overnight.

4. With a mixer on medium high speed, beat the mousse until stiff peaks form. Refrigerate until ready to use.

White chocolate peppermint frosting

½ cup heavy cream
1 T unsalted butter
8 oz. white chocolate
Peppermint extract to taste (1/4 – ½ tsp)

1. Bring the cream and butter to a simmer. Remove from heat and stir in white chocolate and peppermint extract

2. Refrigerate until spreadable.

Assembly

Use a piping bag fitted with a small tip to fill the cupcakes with chocolate mousse. Fill just until cupcake begins to bulge.

Frost with the cooled frosting.

Monday, January 4, 2010

Esterhazy


Chances are good you’ve never heard of an Esterhazy torte, at least if google is any indication. It’s a traditional Hungarian walnut cake, made with thin, meringue like cake layers and a rich walnut filling, which I first had at a little local place, and was absolutely blown away by. Of course, I immediately went home to find a recipe so that I could make it myself, but much to my surprise, there was a relative dearth of information and recipes (one that didn’t look great from about.com did come up). Fortunately, digging through some message boards on cooking websites unearthed a couple of recipes, which I combined into something workable. I’ve actually tried this cake a couple of times, first before thanksgiving, and then I made two of them for New Year’s parties.

I made one major change from the traditional cake. As I’ve seen it at a restaurant, and the few places I’ve found it, an Esterhazy is traditionally topped with a fondant or mirror, which then has a chocolate web made into it. The first time I tried this, my fondant (really, the recipe was just for a glaze) was apparently too loose, and within minutes it flowed off of the cake, literally leaving it sitting in a pool of frosting. I made several more attempts to no avail. I also thought this caused the cake to be overly sweet (a picture of this cake, as I finally served it, is at the bottom of this post). Consequently, the second time I made the cake, I replaced the traditional fondant with a nice chocolate buttercream, which I used to frost the whole outside of the cake. I have to say, this may not be traditional, but combined with the walnuts it was very good. The filling in this cake is also pretty unusual, sort of a cross between a butter cream and a pastry cream, but when it’s done it is to die for. This cake could also be made with almonds, or maybe even hazelnuts. One last note, as a consequence, this cake is incredibly rich, so serve small slices.

Esterhazy Torte

Cake Layersmakes 6 thin layers (the recipe I took from claimed it only made 5, but there was enough left for a sixth)

10 egg whites, room temperature
7/8 cup sugar (this is one cup minus two tablespoons, use vanilla sugar* if you have it)
2 cups + 2 T ground walnuts (about 8 ½ oz)
Zest of 1 medium orange, finely grated
½ cup all purpose flour, sifted

*vanilla sugar can be purchased at specialty stores, or made by combining a vanilla pod with sugar. If you have vanilla powder, you can also put in a little of that. I would not recommend adding vanilla extract to this part of the recipe, as the liquid may cause your whites to lose some of their stiffness.

1. Preheat oven to 300 degrees. Draw 6, eight inch circles on parchment paper, and lay them out on cookie sheets.

2. Combine the egg whites and sugar in the bowl of a mixer, and beat until the whites reach stiff, dry peaks.

3. Fold in the nuts and orange zest. Sift the flour over the mixture and gently fold to combine.

4. Place some batter at the center of one of your parchment circles (somewhere around ¾ of a cup). Using an offset spatula, spread the batter as thinly as possible, covering the entire circle. I would say my layers ended up being about ¼ inch thick.

5. Once all your layers are made, place in the oven for 45 minutes, until crisp and golden. Be careful not to place your layers too low in the oven (if that’s where your heating element is), or they may get scorched on the bottom (learned this the hard way).

6. Remove from the oven, and transfer to cooling racks after about a minute. Promptly peel off the parchment paper. Let sit until completely cool and firm. If you leave them overnight, and they need to be re-crisped, put them in a 185 degree oven for 12 minutes.

Here is a picture of what the completed cake looks like sliced. The individual layers become a little indistinct, but it still tastes great.

Walnut Filling

6 egg yolks
1 ½ cups milk (any kind)
1 ½ cups ground walnuts
6 T cornstarch
1 ½ T sugar
2 t vanilla extract
3 T dark rum
18 T butter (2 ¼ sticks), softened
1 1/2 cups powdered sugar
½ tsp almond extract (optional)

1. In a double boiler, over barely simmering water, whisk together the egg yolks, milk, walnuts, cornstarch, vanilla and sugar. Switch to a spatula and continue stirring, making sure to scrape the bottom of the pan.

2. As you go, the mixture will thicken (you are making a pastry cream). At first, it will appear to separate, as parts are thick and others aren’t, just keep stirring until it becomes uniformly thick. Bring it all the way up to a boil (it will be very thick by this point). Remove from heat.

3. Just so you know, at this point the pastry cream should taste pretty unappetizing, sort of like oatmeal. That is normal (consider how little sugar went in). Whisk in the rum. Press plastic wrap directly onto the surface of the pastry cream, and let set in the refrigerator, at least 4 hours.

4. In the bowl of a mixer cream the butter until fluffy. Add 1 cup of powdered sugar, and beat until fully combined. Add ¼ of the pastry cream, along with the almond extract, and beat to combine. Keep adding it in portions until all pastry cream has been beaten in. If the mixture is too soft, add additional powdered sugar. Do remember it is a filling though, and doesn't need to be pipeable. The end result of this looks a little strange, but should taste great.

Chocolate buttercream

½ pound butter (2 sticks)
½ pound semisweet chocolate (finely chopped, or in chip)
½ tsp vanilla
2-3 cups powdered sugar

1. Melt the chocolate over barely simmering water in the bowl of a double boiler. Set aside to cool.

2. Cream the butter with 1 cup of the sugar until light and fluffy.

3. Once the chocolate is cool enough that it won’t melt the butter, add in the chocolate. Beat until well combined.

4. Beat in additional powdered sugar until frosting is pipeable, and tasty. I tend not to like overly sweetened buttercreams, and so try to stay on the softer side, with less powdered sugar, but you should do what feels right to do, buttercream is incredibly flexible

Assembly

Cake layers

Walnut filling
2 T apricot Jam
1 T dark rum (or cold water)
Chocolate buttercream

1. Place a cake layer flat-side down on your work surface. Spread 1/5 of your walnut filling on it, reaching to all the corners. Try to spread it relatively thinly, as with 6 layers, this is not a cake where you want thick layers of frosting. Place the next layer on top, and gently press it into the frosting, then frost the top of it, and press another layer on. It will look sort of like a stack of pancakes. If any of your layers are misshapen, and stick out beyond the edge of the cake, gently trim them with scissors. If any of your layers crack or break while you’re working, don’t worry about it (it happened to me twice). Just stick them back together, and cover them with filling, this stuff is a little like schlak, and will hold them together without a problem.

2. Continue until you have placed your last layer on top of the cake (this time flat side up). You should not frost the top of the cake with the walnut filling).

3. Use excess frosting to patch up the sides of your cake, first any holes you have, and then just all around the make the edges of the cake even and flat if you can.

Here's one of the cakes with the filling spread around the edges, so it's more even, and the second in the process of getting its crumb coat

4. Simmer the apricot jam with the rum in a small saucepan, just until the jam is melted. Avoiding any big chunks of apricot, use a pastry brush to spread the glaze thinly over the top layer of the cake.

5. Spread a small amount of the chocolate buttercream evenly over the cake, this is your crumb coat. Refrigerate the cake for 10 minutes.

6. Spread the remainder of the chocolate buttercream evenly over the cake. Reserve some for whatever decorations and embellishments you choose.

These are the two completed cakes I made for New Year's Eve


Here is my first attempt at the Esterhazy, with the fondant. Pressed into the sides is some ground up praline. Combined with the fondant, this was too sweet, and the fondant didn't add anything. The chocolate is better.

Wednesday, December 23, 2009

Christmas Cookies!


It seems I’m running out of time to post about the Christmas cookies I made this year. What, after all, is the point of posting Christmas cookies after Christmas? It’s not as if anyone makes New Years Cookies. So, without further delay, here are the Christmas cookies I made this year. For those who don’t know, I have a Christmas cookie party every year in early December. For us law students that is the time directly preceding finals, and so it’s known for being a bit stressful. Getting people together with their favorite cookies (everyone brings some), along with some milk, nog type drinks, or whatever else they can think of. This year I made two kinds of cookies, a family favorite peppermint cookie, and the better than brownie cookies from Tracey’s Culinary Adventures. Both kinds of cookies were good, but the brownie cookies were really big hits, and were all gone by the end of the evening (which could not be said for any other kind of cookie. If you’re looking for a cookie with just the flavor of pure chocolate, I strongly recommend these cookies. The peppermint guys are good too, but they tend to lose their crispness quickly (after a day or two). This can be rectified by re-crisping them for a few minutes in a warm oven.

Peppermint Cookies

Makes ~ 40

¾ cup (1 ½ sticks) unsalted butter, softened
1 1/3 cups sugar, divided
2 eggs
1 tsp peppermint extract
¾ tsp vanilla extract
2 ½ cups flour
¼ tsp salt
1 ¼ cups ground peppermints

1. Preheat oven to 350 degrees. Cream together butter and 1 cup of the sugar until fluffy.

2. Add eggs and extracts, mix until well combined. In a separate bowl whisk together the flour and salt. Add the flour mixture to the butter in three parts.

3. Combine the crushed peppermints with the remaining 1/3 cup sugar.

4. Form the dough into 1 inch balls and roll in the crushed peppermint. Place on a parchment lined baking sheet and bake for 8 minutes, or until golden and just firm.

5. Let cool on the baking sheet briefly, then remove to a cooling rack.


Better than Brownie Chocolate Cookies

Makes ~ 30 (Tracey says 24, I got more though)

2 2/3 cups (about 16 ounces) bittersweet chocolate, chopped
4 tablespoons unsalted butter, at room temperature
4 eggs
1 1/3 cups granulated sugar
1 teaspoon vanilla extract
1/2 cup all-purpose flour
1/2 teaspoon baking powder
1 cup semisweet chocolate chips

1. Preheat oven to 350 F. Put the chocolate and butter in a heatproof bowl and set it over a saucepan of barely simmering water, stirring occasionally, until completely melted and smooth.

2. In a separate bowl whisk together the eggs, vanilla and sugar. Set aside. In a small bowl, sift together the flour and baking powder.

3. Add the melted chocolate mixture to the egg mixture and stir to combine well. Slowly add the dry ingredients, folding them into the batter.

4. Once all of the flour is incorporated, fold in the chocolate chips. This dough will be more like a batter (it’s very runny), that’s how it is supposed to be,

5. Spoon about 1 1/2 tablespoons of dough onto parchment lined baking sheets. Like I said, the dough will be a little runny. Bake for 10-12 minutes or until the cookies are firm on the outside. Like brownies, do not overbake! Leave to cool completely on the baking sheets.


And, if anyone has ever wondered where my penchant of baking comes from, here is a picture of all of the Christmas cookies my mom made this year. I can count 8 different kinds in that photo, and I can testify that they are all delicious.


Wednesday, December 9, 2009

It's French For Melted

That’s right, it’s Fondue. Everyone favorite melted dessert from Switzerland. With the weather turning cold it seemed like the right season to invite people over to eat some well heated foods. Rather than sticking to one kind, I went ahead and made the traditional cheese and chocolate fondues, and then as a third, made pumpkin pie fondue with white chocolate and bourbon. That’s right, three fondues (I don’t own three pots, two were borrowed). All three were excellent, and were eaten up by the end of the evening. The chocolate and cheese fondues were both as you’d expect, but I thought the pumpkin was great (maybe just because it was my own idea), it really tasted like warm pumpkin pie, with a good kick of bourbon in it. Perfect for winter. Also, as a side dish I made ground up pecan praline, so that you could roll something dipped in chocolate or pumpkin in praline. Anyway, I’ve provided all of the recipes here, as well as suggestions for things to dip. I recommend preparing all of these in pots, and then pouring the fondues into the serving pots, as you’ll have better control of the heat over an oven, than over a sterno or whatever you call the controller in electric pots.

Cheese Fondue (From Simplyrecipes)

½ lb gruyere cheese, shredded
½ lb Swiss cheese, such as Emmenthaler or Jarlsberg, shredded
2 T cornstarch
1 clove garlic, peeled and halved crosswise
1 cup dry white wine
1 T lemon juice
1 T kirsch (optional)
Pinch fresh nutmeg

1. Toss the cheese and cornstarch together in a freezer bag and set aside.

2. Rub the inside of the pot with the garlic and discard. Add the wine and lemon juice, bring to a simmer over medium heat.

3. Gradually add the cheese, stirring constantly in a zigzag motion (this helps to keep it from becoming stringy). Do not let it boil.

4. Stir in the kirsch and nutmeg, transfer to serving pot

Suggested dippers

  • French or Italian Bread
  • Cut and blanched vegetables (broccoli, carrots, asparagus)
  • Sausage, other cubed meats
  • Pretzels
  • Apples and Pairs

Chocolate Fondue (Also from Simplyrecipes)

12 oz dark chocolate, chopped
8 oz heavy cream
Frangelico or Amaretto (to taste)
Pinch of salt

1. Put the chocolate chopped in the fondue pot. Bring the cream to a simmer on the stove. Pour the cream over the chocolate and let sit for 30 seconds (If this sounds surprisingly like making ganache, that’s because that’s basically what it is).

2. Stir in the frangelico and salt. Keep over very low heat

Suggested dippers

  • Fruits (apples, pears, bananas, pineapples)
  • Pound or Angle-food Cake
  • Graham crackers
  • Peanut butter cookies (indulgent but wonderful)

Pumpkin Pie Fondue

1 cup milk
1 cup pureed pumpkin
½ tsp cinnamon
¼ tsp ginger
Pinch cloves
Pinch nutmeg
1 tsp vanilla
1 ½ cups white chocolate chips
1/3 cup bourbon
Splash bitters (optional)

1. In a heavy bottomed saucepan over medium heat, whisk together the milk, pumpkin and spices, bring to a light simmer. Remove from heat.

2. Stir in the white chocolate; continue stirring until it has melted. Add the bourbon and bitters, stir to combine. Transfer to fondue pot and keep over low heat.

Suggested dippers

  • Graham cracker
  • Gingersnaps
  • Pound or Angel-food cake

Sunday, November 15, 2009

Halloween

So, it’s only two weeks, past Halloween, so just in time for me to post what I made for my Halloween party. Unfortunately I didn’t really get many pictures of what I made, so instead I’m just going to post links to what I made (it all came from other blogs), along with some brief reviews, although in truth it was all good.

Main: Chicken and Chorizo Sliders

These were great. The chorizo and jalapeno added some nice spice, and the chicken was tasty and moist. I cooked these up on my George Foreman, and I didn’t think they took a full 7 minutes a side. I also made the avocado mayo along side, which went nicely. My only problem was that I couldn’t find slider buns, so I had to use regular hamburger buns, with the result that these were a little bready. Of course, I made a double recipe of these, and by the end of the evening they were all eaten, so no one seemed to complain.

Dessert: Cinnabon Caramel Corn

This stuff was a little like popcorn crack. I made one batch with light brown sugar, and regular corn syrup, and another with dark brown sugar and dark corn syrup (this has much more to do with my having run out of the light stuff after the first batch, and not too much with creativity). The molasses flavor was very nice though, and complemented the other flavors nicely. My only other comment was that this took longer to bake than I was expecting, and letting it bake fully is important. The popcorn gets soggy from the addition of caramel, and the baking really is needed to dry it out. That said, this is super easy to make, and totally worth it.

Other Dessert: Chocolate cupcakes

For these I used one of my own recipes, so I’ve recopied it below. Unfortunately, I can’t tell you what exactly was in the buttercreams, because I just threw it together. I made it with a pound of butter, probably about the same amount of powdered sugar, and some vanilla. I then divided it into thirds, left some as vanilla (which I added red food coloring to, so I could make brains), added melted chocolate and cocoa powder to another third (to make the monsters), and added orange extract and orange food coloring to the third, to make, well, orange ones. These were great cupcakes, and people really enjoyed the decorations.

makes about 60 mini cupcakes

1 ½ sticks (3/4 cup) unsalted butter
1/3 + 2 Tbs cocoa powder (I used Hershey’s special dark)
½ cup + 1 Tbs warm water
1 ½ cups sugar
2 eggs
3/8 cup well shaken buttermilk
1 tsp vanilla extract
1 ½ cup all purpose flour
¾ tsp baking soda
1/8 tsp salt

1. Preheat oven to 350 degrees. Melt the butter in a saucepan over medium heat. Once melted, whisk in cocoa powder until mixture is smooth. Add the water and mix until smooth.

2. Remove from heat. One at a time, mix in sugar, eggs, buttermilk and vanilla.

3. In a separate bowl, mix together the flour, baking soda and salt. Sift it over the liquids and mix to combine.

4. Use a tablespoon measure to fill the mini-muffin tins 2/3 full. Bake for 9-12 minutes, or until a tester comes out clean.

5. Make sure to find a way to keep separate the mint and orange cupcakes, so you don’t swap their frostings.

Sunday, October 25, 2009

Mocha Brownies


A friend of mine had a few people over last night, and I made some brownies to bring. My friend is known for liking coffee flavored things, so I decided on mocha flavored. Some quick google searching took me to Martha’s recipe. I made it almost exactly as Martha’s recipe called for, but I added a teaspoon of extra coffee extract, and some chocolate chunks. All of the chocolate I used (the melted and chunks) came from the same big Trader Joe’s pound plus dark chocolate bar (my favorite for baking, and eating, and anything else chocolate is needed in). I did make it in a 8x8 pan, since I didn’t have a 9x9 pan to use. The result was some very tall brownies, but they tasted great.

Mocha Chunk Brownies

Makes a 9x9 pan

8 tablespoons (1 stick) unsalted butter, cut into pieces, plus more for pan
1 cup all-purpose flour, spooned and leveled
1/4 cup unsweetened cocoa powder
1/2 teaspoon baking powder
1/2 teaspoon salt
2 teaspoons instant espresso powder
16 ounces semisweet or bittersweet chocolate, chopped, divided
1 1/4 cups sugar
3 large eggs
1 tsp coffee extract1. Preheat oven to 350 degrees. Brush a 9-inch square baking pan with butter. Line bottom and two sides with a strip of parchment paper, leaving a 2-inch overhang on the two sides. Butter paper, and set pan aside.

2. In a small bowl, whisk flour, cocoa, baking powder, and salt; set aside.

3. Place butter and half the chocolate in a large heat-proof bowl set over (not in) a saucepan of gently simmering water. Heat, stirring occasionally, until smooth, 2 to 3 minutes; remove bowl from pan.

4. Add sugar to the chocolate and mix to combine. Add eggs, and mix to combine, followed by the coffee extract. Add flour mixture; mix just until moistened (do not overmix). Add instant espresso powder and remaining chocolate chunks. Transfer batter to prepared pan; smooth top.

5. Bake until a toothpick inserted in center comes out with a few moist crumbs attached, 50 to 60 minutes. Cool in pan for 30 minutes. Using paper overhang, lift brownies out of pan; transfer to a rack to cool completely (still on paper). On a cutting board, using a dampened serrated knife, cut into 16 squares. Store in an airtight container at room temperature, up to 2 days.

Monday, October 5, 2009

The Snickers


I’ve had the idea for this cupcake in my head since I first started baking a little over two years ago. I took a shot at it last year in the form of a cake, which was good, but not entirely what I was after. Largely because the nougat just didn’t work out. This weekend, however, I decided to take another shot, this time in a cupcake form. The result was a cupcake that I think definitely captured the essence of snickers, though at least some of my tasters thought that these were too much on the sweet side. I used a cocoa-based buttercream, mostly because I was lazy, I think a buttercream made with full chocolate might have been better. Either way, you might want to reduce the sugar from what I’ve listed. What I failed to keep in mind while tasting was that the nougat and caramel are both pretty sweet. For the cake I just used my favorite chocolate cupcake recipe, which held up well here with a nice chocolate flavor. The caramel recipe is from Martha Stewart’s Chocolate-Salted Caramel cupcakes

These are some of the most challenging cupcakes I’ve ever made, mostly because of the nougat. It’s taken me a good 5 or 6 tries to make it successfully, including two yesterday. For me I think the real problem is that nougat is just not common enough for lots of people to have written about, and so there aren’t a lot of instructions out there on how to make it. I followed the instructions here. I’ve done my best to write my full set of impressions below, but I think it is just one of those things to try a few times until you get the hang of it. The important thing is to coordinate everything in terms of timing, the egg whites and sugar need to be ready at the same time. Unfortunately, the recipe is in grams, which is what I did it in, but I got my grams scale for $5 at Kmart, and it’s worth having, so go out and get one.

The other challenge with these is the assembly. I cut my disks of nougat a little large (mostly because it was the smallest cutter I had). As a consequence I had to hollow out a lot of a large amount of cupcake. The thickness of the nougat also meant the holes had to be very deep. Especially since a layer of nuts and caramel also had to get in there. It’s definitely doable, but takes some effort. Also, the caramel needs to be spooned while it’s still hot, so I filled the cupcakes with the nougat and nuts first, then made the caramel.

Chocolate Cupcakes

Makes ~26

2 sticks unsalted butter
½ cup cocoa-powder
¾ cup water
2 cups sugar
2 eggs
½ cup well-shaken buttermilk
1 T vanilla
2 cups flour
1 tsp baking soda
¼ tsp salt

1. Preheat oven to 350. Sift together the flour, baking soda and salt.

2. Melt the butter in a heavy bottomed sauce pan over low heat. Add in the cocoa powder and whisk until smooth. Then add the water and mix until smooth again. Remove from heat

3. One at a time mix in the sugar, egg, buttermilk, and vanilla

4. Sift the dry ingredients over the wet, and whisk until well combined.

5. Fill cupcakes using a ¼ cup measure. Bake for about 18-20 minutes, or until a tester comes out clean. Let them cool thoroughly before filling.

Peanut Butter Nougat

Makes 1 9 x 13" pan

400 grams sugar
150 grams glucose (white corn syrup)
125 grams water pinch salt
60 grams egg whites (2 large eggs)
125 grams peanut butter

1. line the pan with parchment paper, and oil it. Place the peanut butter in a microwave safe bowl, put it in the microwave, set it for 1 minute, and set aside. Put the eggs and the salt in the bowl of a mixer set with the whisk attachment. Put the sugar, corn syrup, and water in a heavy bottomed saucepan, whisk until combined, and place over high heat.

2. Turn on the mixer to high speed, whisking the eggs up to stiff peaks. Ideally you want the eggs to reach stiff peaks at the same time the sugar gets to the right temperature, but it’s hard to coordinate, and it’s easier to stop egg whites from beating than caramel from cooking. If the eggs get to stiff peaks before the caramel ready, turn off the mixer.

3. While the egg whites are whipping, heat the sugar to 270F. When the sugar hits about 250, turn on the microwave to melt the peanut butter (it’s just a lot easier to mix in melted peanut butter than solid).

4. As soon as the caramel hits 270, turn the mixer on high, and slowly pour the caramel down the side of the bowl.

5. Continue beating the mixture until it cools off slightly, and becomes just slightly doughy. It should still be pretty hot. Remove from the mixer, and gently fold in the melted peanut butter. DO NOT OVERBEAT, or you will make it crumbly. It should still be pourable when you’re done. My first batch needed to be scooped out of the bowl, and didn’t spread at all, it was also immediately crumbly. The second, successful batch poured out of the bowl and flowed properly to fill the pan.

6. Set aside to let cool completely.


This is the successful nougat

This is what the failed nougat looked like

Assembly stage 1

Nougat
Chocolate Cupcakes
Lightly salted peanuts

1. Using a small, circular cutter, cut out disks of nougat. It should cut fairly easily.

2. Cut large, deep cones in the cupcakes. You may need to do some extra hollowing out with the tip of your knife.

3. Place a disk of nougat into each cupcake, top with a few peanuts.

4. Cut the bottoms off of the cones you removed, so that you only have the top, place it back on the cupcake it came from, just to keep track of the proper caps.


I don't know why blogger keeps rotating my images, anyone know how to fix it?

Salted Caramel

2 & 1/2 cups sugar
2/3 cup water
1 tablespoon light corn syrup
3/4 cup heavy cream
1 & 1/2 teaspoons sea salt

1. Place sugar, water, and corn syrup in a heavy bottomed saucepan, stir until clear. Stop stirring and bring to a boil. Continue heating until caramel reaches 360 degrees.

2. Remove from heat. Immediately stir in cream, be careful, the caramel will bubble up and steam. Add the salt and continue stirring.

Assembly Stage 2

Cupcakes from stage
1 Caramel

1. As soon as the caramel becomes manageable, remove the caps from the cupcakes, pour caramel in over the nuts, and reaffix the cupcake tops.

Chocolate Buttercream

3 sticks unsalted butter, softened
1 ½ cups cocoa powder
~4 cups powdered sugar
¼ cup milk

1. Beat the butter until smooth. Add the cocoa, the milk. Beat in the sugar 1 cup at a time, until the frosting reaches a flavor and consistency you like.

2. This frosting was too thick to pipe, so I just spread it on with a spoon. Top with a sprinkling of peanuts.


Tuesday, September 29, 2009

Chocolate Peanut Butter Mousse Cake

So, I’ve become negligent about posting again. Unfortunately it’s been busy lately. Fortunately though, this cake is an excellent return. It is, admittedly, pretty much the cake version of a cupcake I made over the summer. But that didn’t stop it from being excellent. I also used the “Deep Dark Chocolate Cake” recipe from bakewise as the cake, which was an excellent choice. Very chocolaty and moist. This recipe makes more peanut butter mousse than I needed, but I imagine you can find a creative use for the extra. Special thanks, as always, go to my friend Jessica, who helped me a great deal in making this cake (particularly by making the actual cake part).

Chocolate and Peanut Butter Mousse Cake

Chocolate Cake Layers

Makes 3, 8 inch layers

4 cups + 2 T sugar
1 tsp salt
1 cup + 2 T Dutch Process Cocoa Powder
1 ½ tsp baking soda
1 ½ cup water
1 ½ cup canola oil
3 tsp vanilla extract
2 ½ + 2 T Spooned and Leveled AP flour
6 large egg yolks
3 large eggs
3/8 cup buttermilk

1. Preheat oven to 350 degrees. Generously butter cake pans, line with parchment, and butter the parchment.

2. In a heavy saucepan stir together the sugar, salt, cocoa, and baking soda. Bring the water to a boil, stirring constantly, pour the water slowly into the cocoa mixture. Stir the mixture. Place on the heat and bring back to a boil. Turn off and allow to stand for 10 minutes.

3. Pour the cocoa mixture into a large mixing bowl, add the oil and vanilla and beat on low speed for 10 seconds. Still on low speed add the flour, and then quickly add the eggs, yolks, and buttermilk. Pour the batter into the prepared pans, filling about 2/3 full. If you have extra, make them into cupcakes (that’s what I did).

4. Bake for about 30 minutes, until the cake is set, pulls away from the sides of the pan, and a tester comes out clean. Let cool in the pans for 10 minutes, and then invert onto cooling racks to cool completely.

Peanut-Butter Mousse

2 cups creamy peanut butter (not natural)
2 8oz package cream cheese, room temperature
2 cup powdered sugar
2 T vanilla
2 cup chilled whipping cream

1. Beat the peanut butter, cream cheese, powdered sugar, and vanilla together until smooth and well blended.

2. Using clean, chilled beaters, and a chilled bowl, beat the cream to stiff peaks.

3. Fold ¼ of the whipped cream into the peanut butter mixture. Fold in the remaining whipped cream ¼ at a time. Fold until smooth and well mixed. Chill in the fridge until ready to use.

Peanut-butter Ganache

18 oz. dark chocolate, chopped
1 cup creamy peanut butter
2 cups heavy cream

1. Put the peanut butter and chocolate in a bowl.

2. Heat the heavy cream to a simmer, pour over the chocolate

3. Let the cream sit for a minute, then stir until thoroughly mixed. Let the ganache cool until it thickens enough to be spreadable.

Assembly

Place one layer flat side down. Spread about 2 cups of the peanut butter mousse on the cake, all the way to the edge. Place the most imperfect layer in the middle. Spread another 2 cups of peanut butter mousse on the cake. Place the final layer on top, flat side up. Pour about half the ganache over the cake, use an offset spatula to spread it all around the top and sides covering all of the cake. Once this layer of ganache, reheat the remainder just until it flows, and pour it over the cake. I found this ganache was too thick to just let it run down the cake, so I still had to use a spatula to spread it all around. I used a little extra peanut butter mousse to do the decorations.


Friday, August 28, 2009

Double Peanut Double Chocolate Cookies

A friend of mine was hosting a barbeque (cookout of you're a southerner who insists pulled meats must be present for it to be a barbeque). I decided to make up some cookies to bring. I got this recipe from epicurious, but instead of using chocolate chips and peanut butter chips, I used mini peanut butter cups from Trader Joes. These has a nice, cakey texture (if you like a cakey cookie), but I thought they were a little lacking in flavor.

Double Peanut Double Chocolate Cookies

Recipe says it makes 60, but I thought it made closer to 40

1 cup flour
1/2 cup unsweetened cocoa powder
1/2 tsp baking soda
1 tsp baking powder
1 1/2 sticks (3/4 cups) unsalted butter, softened
1/2 cup peanut butter (don't use natural)
3/4 cup white sugar
1/4 cup light brown sugar
2 large eggs
1 tsp vanilla
2 cups mini peanut butter cups

1. Preheat oven to 350. In a large bowl whisk together the flour, cocoa powder, baking soda, and baking powder.

2. In another bowl, cream the butter, sugars, and peanut butter together until light and fluffy. Beat in eggs one at a time, followed by vanilla.

3. Beat in flour mixture, and stir in mini peanut butter cups.

4. Drop dough by teaspoons two inches apart onto a parchment or silpat lined baking sheet. Bake for 10 minutes, remove from oven and cool on cookie sheets for ten minutes before removing to baking racks.

Saturday, August 8, 2009

White Russian Cupcakes

These were the number three cupcakes in the poll I took of my coworkers. For those who don’t know, a white Russian is a drink made with vodka, kahlua and milk. I have to say, I was not a huge fan of these cupcakes. I used a recipe I got here. It could be the all purpose flour I used in place of the cake flour, but I found the texture of the cupcakes to be a little rubbery. The flavors of the alcohol also didn’t come through strongly enough. I frosted the cupcakes with a kahlua ganache, which might have been a mistake, since the chocolate flavor seemed to overwhelm everything else. The whipped cream in the original certainly would have been more faithful to the original drink, but that’s the way it goes.

White Russian Cupcakes

Makes ~15 cupcakes

1 1/2 cups cake flour
1/4 tsp salt
1/2 tsp b. powder
1/2 cup butter, softened
1 cup sugar
2 eggs, room temp
1 egg white, room temp
1/3 cup milk
1/2 tsp vanilla
3 tbsp vodka
3 tbsp kahlua

1. Preheat oven to 350 degrees F. In a small bowl, combine dry ingredients (flour, salt and baking powder). Set aside.

2. In a large bowl, on the medium speed of an electric mixer, cream the butter until smooth. Add the sugar gradually and beat until fluffy, about 3 minutes.

3. Add the eggs, 1 at a time, beating well after each addition.

4. Add the dry ingredients in 3 parts, alternating with the milk and vanilla. With each addition, beat until the ingredients are incorporated but do not over beat.

5. Add vodka and kahlua. Continue beating until incorporated. Using a rubber spatula, scrape down the batter in the bowl to make sure the ingredients are well blended.

6. Using a ¼ cup measure, carefully spoon the batter into the cupcake liners, filling them about 3/4 full. Bake for 20 minutes, or until a cake tester inserted into the center of the cupcake comes out clean.

7. Cool the cupcakes in tins for 5 minutes. Brush tops of cupcake with kahlua. Remove from the tins and cool completely on a wire rack before decorating.

Kahla Ganache

8 oz dark chocolate, chopped
½ cup kahlua
½ cup heavy cream

1. Put the kahlua and chocolate in a bowl.

2. Heat the heavy cream to a simmer, pour over the chocolate

3. Let the cream sit for a minute, then stir until thoroughly mixed. Let the ganache cool until it thickens enough to be spreadable.

Saturday, August 1, 2009

Decadent Chocolate-Peanut Butter Cupcakes

For the end of my summer job, one of my coworkers threw a party so that all of us could celebrate. I, inevitably, made cupcakes (this really has been a cupcake heavy summer, probably because my cupcake pans are all I brought with to DC). For this particular party I let my coworkers vote on cupcake choices. I made the first and third choices (the second was made by another coworker). The number one choice was chocolate-peanut butter cupcakes. For the cupcake base I used one of my standard chocolate-cupcakes, which I filled with a peanut-butter mousse, and frosted with a peanut-butter ganache. The cupcakes were really rich, but excellent. Key to their success was cutting out large cones from the centers of the cupcakes, so that lots of mousse could get in.

Chocolate Cupcakes

Makes ~26

2 sticks unsalted butter
½ cup cocoa-powder
¾ cup water
2 cups sugar
2 eggs
½ cup well-shaken buttermilk
2 T vanillas
2 cups flour
1 tsp baking soda
1 T cinnamon
¼ tsp salt

1. Preheat oven to 350. Sift together the flour, baking soda, cinnamon and salt.

2. Melt the butter in a heavy bottomed sauce pan over low heat. Add in the cocoa powder and whisk until smooth. Then add the water and mix until smooth again. Remove from heat

3. One at a time mix in the sugar, egg, buttermilk, and vanilla

4. Sift the dry ingredients over the wet, and whisk until well combined.

5. Fill cupcakes using a ¼ cup measure. Bake for about 18-20 minutes, or until a tester comes out clean. Let them cool thoroughly before frosting.

Peanut-Butter Mousse

1 cup creamy peanut butter (not natural)
1 8oz package cream cheese, room temperature
1 cup powdered sugar
1 T vanilla
1 cup chilled whipping cream

1. Beat the peanut butter, cream cheese, powdered sugar, and vanilla together until smooth and well blended.

2. Using clean, chilled beaters, and a chilled bowl, beat the cream to stiff peaks.

3. Fold ¼ of the whipped cream into the peanut butter mixture. Fold in the remaining whipped cream ¼ at a time. Fold until smooth and well mixed. Chill in the fridge until ready to use.

Peanut-butter Ganache

6 oz. dark chocolate, chopped

1/3 cup creamy peanut butter

2/3 cup heavy cream

1. Put the peanut butter and chocolate in a bowl.

2. Heat the heavy cream to a simmer, pour over the chocolate

3. Let the cream sit for a minute, then stir until thoroughly mixed. Let the ganache cool until it thickens enough to be spreadable.

Assembly

1. Cut large cones out of the cupcakes. Cut the bottoms off of the cones.

2. Fill the cupcakes with peanut butter mousse. Re-cover the tops of the cupcakes.

3. Pour or spread the ganache over the top of the cupcakes. Refrigerate until 30-45 minutes before serving.