Showing posts with label Cookies. Show all posts

Wednesday, December 23, 2009

Christmas Cookies!


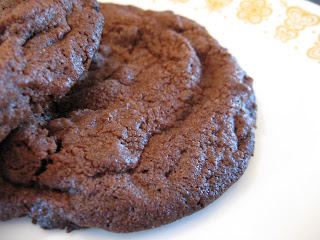
It seems I’m running out of time to post about the Christmas cookies I made this year. What, after all, is the point of posting Christmas cookies after Christmas? It’s not as if anyone makes New Years Cookies. So, without further delay, here are the Christmas cookies I made this year. For those who don’t know, I have a Christmas cookie party every year in early December. For us law students that is the time directly preceding finals, and so it’s known for being a bit stressful. Getting people together with their favorite cookies (everyone brings some), along with some milk, nog type drinks, or whatever else they can think of. This year I made two kinds of cookies, a family favorite peppermint cookie, and the better than brownie cookies from Tracey’s Culinary Adventures. Both kinds of cookies were good, but the brownie cookies were really big hits, and were all gone by the end of the evening (which could not be said for any other kind of cookie. If you’re looking for a cookie with just the flavor of pure chocolate, I strongly recommend these cookies. The peppermint guys are good too, but they tend to lose their crispness quickly (after a day or two). This can be rectified by re-crisping them for a few minutes in a warm oven.

Peppermint Cookies

Makes ~ 40

¾ cup (1 ½ sticks) unsalted butter, softened
1 1/3 cups sugar, divided
2 eggs
1 tsp peppermint extract
¾ tsp vanilla extract
2 ½ cups flour
¼ tsp salt
1 ¼ cups ground peppermints

1. Preheat oven to 350 degrees. Cream together butter and 1 cup of the sugar until fluffy.

2. Add eggs and extracts, mix until well combined. In a separate bowl whisk together the flour and salt. Add the flour mixture to the butter in three parts.

3. Combine the crushed peppermints with the remaining 1/3 cup sugar.

4. Form the dough into 1 inch balls and roll in the crushed peppermint. Place on a parchment lined baking sheet and bake for 8 minutes, or until golden and just firm.

5. Let cool on the baking sheet briefly, then remove to a cooling rack.


Better than Brownie Chocolate Cookies

Makes ~ 30 (Tracey says 24, I got more though)

2 2/3 cups (about 16 ounces) bittersweet chocolate, chopped
4 tablespoons unsalted butter, at room temperature
4 eggs
1 1/3 cups granulated sugar
1 teaspoon vanilla extract
1/2 cup all-purpose flour
1/2 teaspoon baking powder
1 cup semisweet chocolate chips

1. Preheat oven to 350 F. Put the chocolate and butter in a heatproof bowl and set it over a saucepan of barely simmering water, stirring occasionally, until completely melted and smooth.

2. In a separate bowl whisk together the eggs, vanilla and sugar. Set aside. In a small bowl, sift together the flour and baking powder.

3. Add the melted chocolate mixture to the egg mixture and stir to combine well. Slowly add the dry ingredients, folding them into the batter.

4. Once all of the flour is incorporated, fold in the chocolate chips. This dough will be more like a batter (it’s very runny), that’s how it is supposed to be,

5. Spoon about 1 1/2 tablespoons of dough onto parchment lined baking sheets. Like I said, the dough will be a little runny. Bake for 10-12 minutes or until the cookies are firm on the outside. Like brownies, do not overbake! Leave to cool completely on the baking sheets.


And, if anyone has ever wondered where my penchant of baking comes from, here is a picture of all of the Christmas cookies my mom made this year. I can count 8 different kinds in that photo, and I can testify that they are all delicious.


Friday, August 28, 2009

Double Peanut Double Chocolate Cookies

A friend of mine was hosting a barbeque (cookout of you're a southerner who insists pulled meats must be present for it to be a barbeque). I decided to make up some cookies to bring. I got this recipe from epicurious, but instead of using chocolate chips and peanut butter chips, I used mini peanut butter cups from Trader Joes. These has a nice, cakey texture (if you like a cakey cookie), but I thought they were a little lacking in flavor.

Double Peanut Double Chocolate Cookies

Recipe says it makes 60, but I thought it made closer to 40

1 cup flour
1/2 cup unsweetened cocoa powder
1/2 tsp baking soda
1 tsp baking powder
1 1/2 sticks (3/4 cups) unsalted butter, softened
1/2 cup peanut butter (don't use natural)
3/4 cup white sugar
1/4 cup light brown sugar
2 large eggs
1 tsp vanilla
2 cups mini peanut butter cups

1. Preheat oven to 350. In a large bowl whisk together the flour, cocoa powder, baking soda, and baking powder.

2. In another bowl, cream the butter, sugars, and peanut butter together until light and fluffy. Beat in eggs one at a time, followed by vanilla.

3. Beat in flour mixture, and stir in mini peanut butter cups.

4. Drop dough by teaspoons two inches apart onto a parchment or silpat lined baking sheet. Bake for 10 minutes, remove from oven and cool on cookie sheets for ten minutes before removing to baking racks.

Friday, August 21, 2009

Browned Butter


Sorry for the delay in my blogging. It's been a busy few weeks, and I've been feeling a little lazy (as is known to happen when the summer heats up). Anyway, a few weeks ago, while I was back home, my mother brought a recipe for Browned Butter Oatmeal Cookies to my attention. I'd never used browned butter before, and the article in which she had seen the recipe (in an issue of Vogue apparently), had boasted that they were the best oatmeal cookies. The recipe is very simple, and essentially makes shortbread with oatmeal in it. The resulting cookies were excellent. Crispy and sandy, with a wonderful toasted taste. These were definitely worth the foray into brown butter. The brown butter actually used in the recipe is a little odd itself, and I've included the recipe for it after the cookie recipe. A candy thermometer is helpful here.

Oatmeal Brown-Butter Cookies

Makes about 30

1 cup browned butter, room temperature
1 cup sugar
2 cups quick cook oatmeal (not instant)
1 tsp baking soda
1/2 tsp salt
1 cup flour
1 tsp vanilla

1. Preheat oven to 350 degrees. In a large bowl, use a wooden spoon to beat together the sugar and softened butter (the goal is not to cream the butter here, I found this took a fair amount of jabbing with the blunt end of my spoon).

2. In another bowl, combine the oatmeal, baking soda, salt, and flour. Using a wooden spoon, mix these into the butter (this again took a lot of mashing). Mix in the vanilla. The result should be crumbly, but cohesive enough to squeeze into balls.

3. Place 1 inch balls of dough 2 inches apart on a cookie sheet. Flatten the cookies with a fork until they are 1/4 inch thick.

4. Bake for 10 minutes, until pale-gold. Let cool on their sheets for a minute, then transfer to cooling racks to cool completely.

5. Store in an airtight container.

Browned Butter

This makes 2 cups, more than you'll need for one batch of cookies

1 lb butter
1 cup powdered milk

1. Take a large bowl and fill it with ice, put a smaller, but still sizable bowl in it (ideally metal). You will need to pour your butter into this later. Set aside.

2. In a large, heavy bottomed saucepan, melt the butter over medium heat. Whisk in the powdered milk. Continue heating the butter, stirring occaissionally. The butter will begin to bubble and foam, this is the water boiling off.

3. Continue heating the butter until it stops sizzling. It should begin to darken. Let the butter cook until it is a medium brown, like the color of a paper grocery bag. Alternatively, the temperature should reach between 245 and 250 degrees F.

4. Pour the butter into the prepared cold bowl. Immediately begin vigorously whisking the butter. At first butter will begin to solidify around the edges, use your whisk to scrape this off and reincorporate it into the whole butter mass. Stop whisking when the butter becomes too thick. This will take some time.

5. Move to an airtight container and refrigerate until ready to use.

Sunday, May 31, 2009

Mixed Nut and Chocolate Cookies


It turns out I have had some time to bake while here in DC for the summer, so I decided to make some cookies to bring into the office. My original intention was to make cashew butter cookies with white chocolate, but the store was out of cashew butter, so instead I used almond butter. But, it turns out I didn’t have enough almond butter, so I had to use some peanut butter. And of course, the ground nuts I used (I chopped them with a knife), were cashews. Hence why these are a mixed nut cookie. I also used both white and semisweet chocolate chips in these cookies. Overall, I’m not positive the variety of nuts or nut butters really came through, it might have been easier to just use peanut-butter, but the cookies themselves were excellent. The recipe is based on one I found here. I made these cookies small, and doubled the recipe when I made it, which made a huge number of cookies, nearly 150.

2 1/2 c flour 
1/2 tsp baking powder 
1/2 tsp baking soda 
1 tsp salt 
16 Tbs (2 sticks) unsalted butter, softened but still cool 
1 c brown sugar 
1 c granulated sugar 
1 c almond butter 
2 large eggs 
1 T vanilla 
1 c cashews 
6 oz. white chocolate chips 
6. oz. semi-sweet chocolate chips.

1. Preheat oven to 350 degrees. Whisk together the flour, baking soda, baking powder and salt.

2. Beat the butter until creamy. Add the sugars and beat until fluffy. Add the vanilla, followed by the eggs one at a time.

3. Beat in the almond butter. Stir in the flour mixture, followed by the chopped cashews and the chocolate chips.

4. Roll the cookie dough into 1 T sized balls. Place on cookie sheets 1-2 inches apart. Bake for 11 minutes, or until just browned. Remove from the oven and let cool.

Sunday, May 10, 2009

Aztec Chocolate Cookies

Finals time is finally over! Hooray! Of course I still have a massive research paper to write, but that won’t stop me from doing some baking. Of course the end of finals entailed some celebrations, so I made some cookies. I found this recipe for “Aztec Chocolate Cookies” here, and thought they sounded pretty good; and they definitely lived up to my expectations. They were a little spicier than I expected, but I didn’t mind it. It also turned out I didn’t have any chocolate chips, so instead I chopped 7oz. of a semisweet chocolate bar (I used part of a Trader Joe’s Pound Plus Bar). I think the irregular chunks added something to the cookies over chocolate chips. The chocolate stayed gooey for hours after baking. I would definitely recommend these.

Aztec Chocolate Cookies

Makes ~25

1 1/2 cups plus 1 tablespoon all-purpose flour
1 teaspoon ground ginger
1 teaspoon ground cinnamon
1/4-1/2 teaspoon ground chipotle chili pepper
1 tablespoon cocoa powder
1/2 cup (1 stick) unsalted butter
1/2 cup dark-brown sugar, packed
1/4 cup honey
1 teaspoon baking soda
1 teaspoon vanilla extract
7 ounces semisweet chocolate chips / chocolate chunks
1/4 cup granulated sugar

1. In a medium bowl mix together the flour, ginger, cinnamon, chipotle powder, and cocoa powder.

2. In a large bowl, beat the butter and brown sugar until fluffy. Add the honey and vanilla and beat until mixed.

3. In a small bowl dissolve the baking soda in 1 ½ tsp boiling water. With the mixer on low speed add half the flour mixture, followed by the baking powder mixture, and then the rest of the flour.

4. Stir in the chocolate chunks. Place the dough in the fridge for 30 minutes.

5. Preheat oven to 325 degrees. Roll the dough into 2 inch balls, and roll them in granulated sugar. Place the dough 2 inches apart on a parchment or silpat lined baking sheet. Flatten the cookies slightly. Bake the cookies for 18-20 minutes.

6. Cool the cookies on the sheets for 2 minutes, then transfer to a cooling rack to cool until cool, if you can wait that long.

Sunday, April 12, 2009

Chocolate and Hazelnut Cookies, Who Could ask for More?

It’s been another bit of a break since my last post. I keep apologizing for the long breaks, but they’re going to keep happening for awhile. It just seems like baking it taking a back burner to other, more pressing concerns these days. I have done some cooking, but nothing really worth posting about. I’ll try to get better I promise. In those lines I may have a guest blogger joining me later in the week...

In the meantime, here are some awesome chocolate and hazelnut cookies. I got the recipe here, at Cookie Madness. The recipe calls for stuffing the cookies with nutella, which is always a good call, but to make things interesting I decided to fill half the cookies with dulce de leche. While the nutella was good, I thought the DDL was better, it contrasted a little more with the surrounding cookie, and so I was a little more aware of it. If you’re too lazy to make your own DDL (recipe is below), you can use store bought DDL, or barring that, you could probable just stick one of those Kraft caramel cubes in there. These cookies were really excellent though, and they make a pretty small batch, which has its advantages.

Chocolate and Hazelnut Lava Cookies

Makes 8

2 oz chopped hazelnuts plus about 1 tablespoon unsalted butter
3 tablespoons unsalted butter, cut into chunks
1 cup semi-sweet chocolate chips
1 large egg
1/3 cup granulated sugar
1/2 scant teaspoon salt
1 teaspoon vanilla extract
1/2 cup lightly spooned and leveled flour1/4 teaspoon baking powder
8 teaspoons Nutella or Dulce de leche

1. Place the nuts and accompanying butter into a skillet over medium high heat. Cook until butter is melted and nuts are aromatic, about 4-5 minutes. Remove from heat and set aside.

2. Melt the butter in a medium sauce-pan over medium-high heat. Once the butter is melted at the chocolate, stir constantly until mixture is smooth, remove from heat and set aside.

3. In the bowl of a mixer (hand or stand mixer will work) combine the egg, sugar, vanilla, and salt. Beat on high speed for 2 minutes. Beat in the chocolate mixture. Stir in the cooked nuts.

4. Whisk together the flour and baking powder. Pour the flour over the batter, and stir together. Once dough is fully incorporated, cover the bowl with plastic wrap and refrigerate for 1 hour.

5. Preheat oven to 375 degrees. Scoop generous tablespoons of dough into balls on a parchment lined cookie sheet. Make a depression in each ball, and fill it with nutella or dulce de leche. Use more dough to cover the filling. (pictures below)

6. Bake cookies for 12 minutes. Remove and let cool on the sheet for 5-7 minutes before transferring cookies to a cooling rack.

Dough Balls
Depressions made
Filled

 Sealed

Dulce De Leche

If you’ve never made it before, dulce de leche is the easiest thing to make. Take a can of sweetened, condensed milk (not non-fat, I’ve tried and it tastes funny), and remove the label, as well as any glue. Submerge the can in water in a large pot, making sure the can is completely covered with water. Bring the water to a boil over medium high heat. Cover the pot and let it boil for at least 2 hours*, checking every half an hour or so to add water (Important – Never let the water level dip below the can, if the can is not covered, it may explode!). Remove the can after two hours (using tongs), and place on a cooling rack. Let the can come to room temperature, when you open it, you will have dulce de leche.

*I’ve experimented with this, letting one can boil for up to four hours. The longer time you leave the can to boil, the darker and thicker the dulce de leche will get, and the more complex the flavor. It’s sort of fun to put 3 or 4 cans in one pot, and remove them at different times to compare. 2 hours is fine though, and makes a nice, light, milky dulce de leche.

Saturday, February 14, 2009

My First Macarons


I know that by posting this I am contributing nothing to the culinary world, basic recipes for macarons abound, and I just used someone else’s. In fact, if you want to make macarons, I strongly recommend this guide, which is what I used. Nonetheless, I am posting this because these are my first macarons, and I feel like making macarons are some kind of baking right of passage, given their notorious fickleness. Truthfully, these macarons weren’t perfect, the outer shell was very brittle, and there was a large air pocket. And from the descriptions in the guide, I suspect I overbeat the batter, as it was a little too thin when I was piping it. But, they grew feet, didn’t crack, and taste like almond, so I was at least pretty close. I have no idea how many cookies this actually makes, I successfully made 9 sandwiches, but that includes a lot of waste. Also, this recipe is in grams. I bought a small, plastic scale that measures in grams for under $5 from Kmart, so don’t let lack of one stop you. Especially if you’re interested in doing lots of European style baking, it’s worth having. I filled the macarons with a simple chocolate ganache

Basic Macarons

90 grams egg white (about 3 eggs worth) – separated and allowed to sit out for 24 hours (not covered with plastic) 
120 grams almond meal 
145 grams confectioner’s sugar 
75 grams regular sugar

1. Place the almond meal and confectioner’s sugar in a food processor, pulse until it is mixed into a fine powder

2. Put the room temperature egg whites in the bowl of a standing mixer. Beat the egg whites at high speed until they are foamy and stiff peaks form.

3. Turn the mixer speed down to medium, and very gradually beat in the regular sugar. Continue beating until you get a stiff, glossy meringue (I beat until stiff peaks, but this might have been too much)

4. Remove the bowl from the standing mixer. Pour the sugar-almond mixture over the eggwhites. Using a folding motion begin to combine them (this should not be gentle folding). Continue folding until the mixture reaches a “magma like consistency,” or until a ribbon of batter dropped onto the rest takes about 30 seconds to disappear back into the mass. Tartlette says this should take about 50 strokes.

5. Using a large tip, pipe the meringue onto a parchment or silpat lined baking sheet. The circles will spread out a little, so leave space. Try to make the circles 1 ½ - 2 inches across.

6. Let the piped cookies sit out on the counter for at least an hour. Preheat your oven to 350 degrees.

7. Put the cookie sheet on the oven’s center rack for 2 minutes. After two minutes, wedge the oven door open with a wooden spoon, and continue baking for another 5 minutes, or until the cookies have developed feet, and are a creamy ivory color

8. Remove from the oven and let cool on the cookie sheet for a few minutes. Gently remove the cookies from the sheet and place them on a cooling rack (I lost a few cookies that stuck to the sheet, I’m under the impression this is inevitable).


Chocolate Ganache

9 oz. bittersweet chocolate, chopped
1 cup heavy cream 
2 T butter

1. Put the chocolate in a bowl. Pour the cream into a saucepan over medium high heat until it comes to a simmer.

2. Pour the heated cream over the chocolate and let it sit for 30 seconds. Add the butter and begin whisking. Whisk until the mixture is uniform.

3. Let the ganache cool to a spreadable consistency. If you’re impatient like me, stick it in the freezer, removing to whisk every few minutes to keep it even.

4. Gently sandwich the macarons with the ganche. Eat


Sunday, January 25, 2009

Blood Orange Sandwich Cookies


Sorry for the longer than expected delay, but it’s been a really busy week phasing back into the semester. Fortunately I found some time tonight to bake. I had been keeping my eyes open for blood oranges for quite some time, and finally found some the other day. All that was left was to decide what to make. Not having a whole lot of time this weekend I decided to go for something simple, chocolate and almond cookies with blood orange curd filling. For the cookie base I decided to go with a shortbread base, with mini-chocolate chips mixed in. 

I thought these cookies were good, but a little gooey. The shortbread was very crispy, and so the filling tends to squirt out when you bite down. The filling was good, but not the strongest blood orange flavor in the world, I think one of the oranges I used was a little on the weak side. UPDATED: these cookies taste a lot better if you store them in the fridge for awhile, the curd stays firmer, and so doesn't squeeze out when you bite, and the flavors mingle better.

Almond Chocolate-Chip Shortbread

Makes 40 Sandwiches (80 cookies)

1-1/2 cups (3 sticks) unsalted butter, softend
1 cup confectioners' sugar
2 tablespoons granulated sugar
1/4 teaspoon salt1/4 teaspoon almond extract
1/2 teaspoon vanilla extract
1/3 cup ground almonds (I ground about ¾ of a cup of whole, blanched almonds to get this amount)
3 cups unbleached all-purpose flour  
¾ cup miniature chocolate chips

1.  Cream together the butter and the sugars on medium speed until fluffy. Mix in the salt, the extracts, the almonds, the chocolate chips, and the flour. Once the dough starts to come together into medium sized clumps stop the mixer and press the dough together with your hands.

2. Wrap the dough in plastic wrap and refrigerate for 30 minutes.

3. Preheat the oven to 350 degrees. Take the dough out of the fridge.  Break the dough into two pieces. On a floured surface roll out one of the disks until it is about ¼ inch thick. Use a round cookie cutter, or a glass to cut 1 inch circles out of the dough. Pick up the extra dough, and transfer the circles to the cookie sheets. Roll out the second disk of dough and do the same, then combine the extra pieces of dough and roll it out. Continue rolling out the dough until you have made as many cookies as you can.

5. Bake for 10-13 minutes, or until the edges are just turning golden. Remove from the oven and let cool on the cookie sheets

Blood Orange Curd

½ cup blood orange juice 
2 tsp finely grated blood orange zest 
2 tsp lemon juice 
½ cup sugar 
3 eggs 
½ cup (1 stick) unsalted butter, cut into cubes

1. In the bowl of a double boiler over medium-high heat, mix all ingredients except for the butter. Whisk constantly until the mixture thickens and the whisk begins to leave a trail (175 degrees on a candy thermometer)

2. Remove from heat and quickly whisk in the butter.

3. Pour the curd into a bowl or baking dish, and press plastic wrap onto the surface. Place into the fridge and refrigerate until it has firmed up.

4. Once the curd is firm, place 1-2 tsp of curd onto the bottom of one cookie, and sandwich with another. Store in an airtight container in a refrigerator.

Friday, December 19, 2008

Cardamom Snaps


Another recipe from the Better Homes and Gardens website, these cookies are similar to ginger snaps, but with a nice cardamom flavor. Molasses cookies aren’t my favorites, but I have a very hard time saying no cardamom (it’s a personal favorite flavor of mine). I thought these came out very nicely, soft and chewy, with a good flavor of cardamom, though the molasses is definitely the dominant flavor. As a plus, they came together in only a few minutes which is always a plus.


Cardamom Snaps

Makes about 36

¾ cup shortening 
1 cup packed brown sugar 
1 tsp baking soda 
2 tsp ground cardamom, divided 
1 tsp cinnamon 
¼ cup mild molasses 
1 egg 
2 ¼ cup AP flour 
¼ cup granulated sugar

1. Preheat oven to 375 degrees. Beat shortening on medium speed in a mixer for 30 seconds. Add the brown sugar, baking soda, 1 ½ tsp cardamom and cinnamon. Beat to combine. Scrape down the sides of the bowl.

2. Add the molasses and egg and beat to combine. Beat in the flour until the dough comes together.

3. Combine the granulated sugar and the remaining ½ tsp cardamom in a bowl. Roll the dough into one inch balls, and roll the balls in the cardamom-sugar mixture. Space the balls two inches apart on an ungreased cookie sheet, and bake for ten minutes, or until tops are cracked and edges are set. Let cool on a wire rack.

Saturday, December 13, 2008

Spiced Pumpkin Dunking Sticks


Well, its finals time, which means I’m hunting for just about anything to do other than study. A friend of mine recently sent me looking at the Better Homes and Gardens holiday cookie recipes, and I must say a lot of them look pretty appealing. I didn’t want to go to the store, so I picked a recipe I already had all the ingredients for (believe it or not I did have a spare can of pumpkin sitting around). When it came to piping them out, the website’s instructions said to pipe them out into a corkscrew motion, which I found to be impossible. The dough is far too thick for any kind of piping. Instead I rolled the dough into logs with my hands into logs about 4-5 inches long and 1 inch thick, and baked them like that, which worked fine. I also didn’t have a lemon, so I used orange juice in its place in the glaze. I thought these cookies were ok, but a friend I gave them to raved about them.


Spiced Pumpkin Dunking Sticks

Makes About 20

1 cup butter, softened 
½ cup sugar 
1 tsp ground cinnamon 
¾ tsp baking powder 
½  tsp ground nutmeg 
½ tsp ground ginger 
¼ tsp salt 
¼ tsp ground cloves 
1/3 cup canned pumpkin 
1 egg 
1 tsp vanilla 
2-1/2 cups all-purpose flour

1. Preheat oven to 400 degrees. Beat the butter on medium speed in an electric mixer for 30 seconds. Add the sugar, cinnamon, baking powder, nutmeg, ginger, salt, and cloves, and beat until fully combined.

2. Scrape down the sides of the bowl. Add the pumpkin, egg and vanilla and beat until combined. Add the flour and beat in on low speed until combined. This might be a strain on your mixer, so you may have to beat in the last of the flour by hand.

3. Using a wide tip, pipe the dough using a corkscrew motion, making cookies about 4 to 5 inches long. If you can’t make this work (which I can’t), just use your hands to roll the cookies into logs about 1 inch thick and 4 – 5 inches long.

4. Place on an ungreased cookie sheet and bake for 5 to 7 minutes, or until just firm to the touch.

5. Let the cookies cool completely. Once Cool, glaze (recipe follows).


Glaze

1 ½ Oz. Cream Cheese

1 T unsalted butter, softened 
¼ tsp finely grated lemon peel 
1 tsp lemon juice 
¼ tsp finely grated orange zest 
¾ cup powdered sugar 
2-3 tsp milk

1. Beat together the cream cheese and butter until smooth. Add the lemon and orange peels, the lemon juice, and the sugar.

2. Mix in enough milk for the glaze until it can be drizzled.

3. Drizzle the glaze over half of each cookie. Let sit for about 3 hours, or until glaze is set.

Monday, December 8, 2008

Rugelach


Amongst the cookies I made for my holiday party last week (the third, some roll out sugar cookies, won’t be featured because they got eaten before I could take pictures) were rugelach from Dorie Greenspan’s Baking from My Home to Yours. I thought of all the cookies I made for that night, these were my favorite. I didn’t use currants in this recipe, because I didn’t have any, but I think they would have been good.

Dorie Greenspan’s Rugelach

Makes 32

Dough

4 oz. Cold Cream cheese, cut into 4 pieces 
8 T (1 stick) unsalted butter, cut into 4 pieces 
1 cup AP flour 
¼ tsp salt

Filling

2/3 cup raspberry or apricot jam, or marmalade 
2 T sugar 
½ tsp cinnamon 
½ cup chopped pecans
¼ cup plump, moist dried currants 
4 oz. bittersweet chocolate, finely chopped, or 2/3 cup mini-chocolate chips

Glaze

1 large egg 
1 tsp cold water 
2 T coarse decorator’s sugar (or regular)

1. Make the dough: Let the cream cheese and butter soften on the counter for 10 minutes (you don’t want them fully softened). Put the flour and salt in a food processor, scatter the butter and cream cheese over them. Pulse the machine 6 – 10 times, then scrape down the sides of the bowl and run the bade until the dough forms large curds. Don’t work it so long that it forms into a ball on the blade.

2. Divide the dough in half, flatten each half into a disk, wrap in plastic, and refrigerate for 2 hours.

3. (These things are mixed in three separate bowls, don’t mix them all together) Heat the jam in a saucepan over low heat until it liquefies. Mix the cinnamon and sugar together. Mix the nuts, chocolate and currants together.

4. Take the dough out of the fridge, let it rest just until it is soft enough to roll out. On a lightly floured surface, roll out half the dough into an 11-12 inch circle. Spoon or brush a thin gloss of the jam over the dough. Sprinkle have the cinnamon and sugar mixture evenly over the jam. Scatter half the chocolate mixture over the dough. Cover the filling with a piece of wax paper and gently press the filling into the dough.

5. Use a pizza cutter to divide the dough into 16 triangles. The easiest way to do this is to cut the dough into quarters, and then cut each quadrant into 4. Starting at the base of each triangle, roll the dough up until each cookie becomes a little crescent (like a crescent roll). Repeat with the remaining dough half. Refrigerate the rolled up cookies for 30 minutes.

5. Preheat the oven to 350 degrees. Mix the egg and water together. Brush the cookies with the glaze. Sprinkle a little sugar over each cookie. Bake the cookies for 20 to 25 minutes, until they are puffed and golden, rotating the sheets from top to bottom and front to back halfway through. Let cool completely on wire racks.

Thursday, December 4, 2008

Chocolate Peppermint Pinwheels

I know it’s been awhile, but with going home for Thanksgiving and studying for finals I just haven’t had much time to cook lately. Fortunately I threw a holiday party last night, and so got the opportunity to make some new Christmas cookies, which will appear over the next week or so. This first recipe comes from Alton Brown, and I have to say I thought they were disappointing. While these cookies make a great presentation, I thought the flavor was lacking. The peppermint came through ok, but the chocolate didn’t. In addition I thought the whole cookie wasn’t quite sweet enough, and tasted of flour. Maybe it was just me, but I don’t think these are worth the trouble of making again.

Alton Brown’s Chocolate Peppermint Pinwheels

Makes 36

3 cups AP flour 
¾ baking powder 
½ salt 
1 cup (2 sticks) unsalted butter, softened 
1 cup sugar 
1 egg, beaten 
1 T milk
3 oz. Unsweetened Chocolate, melted 
1 tsp vanilla 
1 egg yolk 
1 tsp peppermint extract 
½ cup crushed candy canes or peppermint candies (I ground them pulsing in a food processor)

1. Sift together the flour, salt and baking powder, and set aside. In the bowl of a standing mixer cream together the butter and the sugar until pale and fluffy.

2. Add the egg and the milk and beat to combine. Scrape down the sides of the bowl, turn down the mixer speed to low, and add the flour. Beat until the dough pulls away from the sides.

3. Divide the dough in half. Use your hands to mix the chocolate and the vanilla into half the dough. Mix the egg yolk, peppermint extract, and crushed candy into the other half of the dough.

4. Sprinkle powdered sugar onto wax paper and roll out the chocolate dough into a rectangle, until it is about a ¼ inch thick. I used a cookie sheet as a guide for size. Repeat with the peppermint dough (I used the cookie sheet to make sure that the two doughs were the same size).

5. Lay the peppermint dough over the chocolate dough, making the edges flush. Push the edges together. Using the wax paper to help, roll the dough into a log. Wrap the log in plastic wrap and refrigerate for two hours or up to a day.

6. When ready to bake, preheat the oven to 375 degrees. Use a knife to cut the log into ½ inch slices, rotating ¼ turn after each cut to make sure the log stays round. Place the cookies on a parchment or silpat with one inch between each cookie.

7. Bake for 12 -13 minutes, rotating the sheets half way through. Let cool on the pan for a minute, then transfer to a wire rack to cool.

Wednesday, November 12, 2008

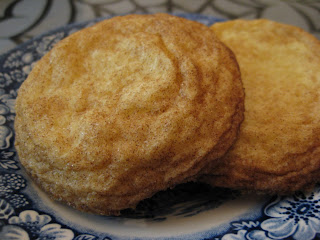
Snickerdoodles

I find myself turning yet again to Martha Stewart’s cookie book when I’m looking for a cookie recipe. A friend of mine was having an event at his place, and I happened to know he was a big fan of snickerdoodles, so I decided to whip these up. Fortunately, this recipe comes together incredibly quickly, and turned out very good. They weren’t quite as soft as snickerdoodles I’m used to (admittedly, I don’t eat a lot of snickerdoodles), but my guess is that it’s because this recipe uses butter in place of shortening.

Martha’s Snickerdoodles

Martha says it makes 18, I found closer to 24

2 ¾ cups flour 
2 tsp baking powder 
½ tsp salt 
1 cup (2 sticks) unsalted butter, room temperature 
1 ½ cups plus 
2 T sugar 
2 large eggs 
2 tsp ground cinnamon

1. Preheat oven to 350 degrees Sift together the flour, baking powder, and salt.

2. Beat together the 1 ½ cups of sugar and the butter at low speed until fluffy. Turn the mixer speed up to medium and add the eggs. Gently mix in the flour mixture.

3. Roll the dough into 1 ½ inch balls. Mix the remaining 2 T of sugar and the cinnamon. Roll the dough balls in the cinnamon sugar mixture until they are completely covered.

4. Bake the cookies (I found an insulated baking sheet worked best for these), leaving them lots of room on the sheets to spread out. Bake for 12-15 minutes, or until the edges are golden. Let cool on a rack. 

Friday, September 26, 2008

Sorta Alfajores


This is the third and final cookie I made for my Christmas in September party. These aren’t quite alfajores, because they don’t use dulce de leche. I had made some caramel a week ago for the apple cupcakes, but it ended up too burnt tasting for me to want to use it. Instead I put it in the fridge and saved it to make a burnt caramel frosting at some point in the future. I ended up using it for these cookies. The cookie base is an orange-almond shortbread, and the filling is the burnt caramel frosting. People really loved these, although they were a little messy to eat because the caramel would leak out. The recipe I’ve provided also makes WAY more caramel filling than you need for the number of cookies. Stick it in the fridge and use it to frost some cupcakes.

Almond-Orange Shortbread

Makes 18 Sandwiches (36 cookies)

1-1/2 cups (3 sticks) unsalted butter  
1 cup confectioners' sugar  
2 tablespoons granulated sugar  
1/4 teaspoon salt 
1/4 teaspoon orange extract  
1/2 teaspoon vanilla extract  
1/3 cup ground almonds (I ground about ¾ of a cup of whole, blanched almonds to get this amount)  
3 cups unbleached all-purpose flour

1. Cream together the butter and the sugars on medium speed until fluffy. Mix in the salt, the extracts, the almonds, and the flour. Once the dough starts to come together into medium sized clumps stop the mixer and press the dough together with your hands.

2. Wrap the dough in plastic wrap and refrigerate for 30 minutes.

3. Preheat the oven to 350 degrees. Take the dough out of the fridge. Break the dough into two pieces. On a floured surface roll out one of the disks until it is about ¼ inch thick. Use a round cookie cutter, or a glass to cut 2 – 3 inch circles out of the dough. Pick up the extra dough, and transfer the circles to the cookie sheets. Roll out the second disk of dough and do the same, then combine the extra pieces of dough and roll it out. Continue rolling out the dough until you have made as many cookies as you can.

5. Bake for 12 – 14 minutes, or until the edges are just turning golden. Remove from the oven and let cool on the cookie sheets

Caramel Filling

1 cup sugar
6 Tbs butter
½ cup heavy cream
2 sticks butter softened
8 oz. fat free cream cheese
3 cups confectioner’s sugar
1 tsp vanilla extract

1. Put the sugar in the bottom of a medium large, heavy-bottomed saucepan over medium high heat. Whisk the sugar constantly until it is fully melted and begins to bubble.

2. As soon as the sugar begins to bubble, add the 6 Tbs of butter and continue whisking constantly until the butter is melted.

3. Take the caramel off the heat. Count to three, and then pour in the heavy cream. Recipes say that the caramel will really bubble up at this point, but mine never does. If it’s not bubbling start whisking briskly to keep the caramel even. Once the caramel has cooled a little, pour it into a measuring cup to cool.

4. Once the caramel has cooled off, cream together the remaining two sticks of butter and the cream cheese until they are fluffy. Add the caramel and vanilla and beat to combine. Begin adding the powdered sugar. Beat in at least 2 cups and taste, add the third cup if you think it needs it.

Assembly

1. Spoon ~ 2 tsp of caramel onto the bottom of a cookie, and press another cookie on top of the caramel.

2. Sift confectioner’s sugar over the cookies for decoration.

Tuesday, September 23, 2008

Look to the Cookie


This is the second type of cookie I made for my Christmas in September party. People thought they were really excellent, as black and white cookies go. The recipe I used came from Desserts by the Yard by Karen Yard. The only change I made was to make more frosting, because I didn’t think the recipe provided enough. I used the entire recipe to make the white side of the cookies, and then made it half again of the frosting for the chocolate part, which provided enough. I also had to add way more water than the recipe called more to make the frosting even remotely spreadable. I applied it with a butter-knife rather than a brush, because I found that to be a lot easier.

Black and White Cookies

Cookbook says the recipe makes 42 small  cookies, I found it made 32

1 cup cake flour 
1 cup all purpose flour 
1 tsp baking powder
1 1/2 sticks butter
1 cup sugar
1 large egg
1 tsp vanilla extract
1/2 cup buttermilk

for the icing
2 1/2 C plus 1 tsp confectioner’s sugar
1 tbsp light corn syrup, plus more as needed
2 tbsp hot water, plus more as needed
1 tsp vanilla extract
1 oz. bittersweet chocolate, finely chopped
2 tbsp unsweetened cocoa powder (Not dutch process)

1. Preheat the oven to 350 degrees. Sift together the flours and the baking powder, set aside.

2. Cream the butter and sugar at medium speed until fluffy, about two minutes. Add the egg and vanilla and mix at medium speed until combined. Scrape down the sides of the bowl and paddle.

3. Begin adding the flour mixture and the buttermilk, alternating additions, doing it two or three times.

4. Put tablespoons of the dough on a parchment or silpat lined baking sheet. Put the cookies in the oven one sheet at a time. Bake for 8 minutes, then rotate the pan and bake for another 4 to 6 minutes, until the edges of the cookies are golden. Let cool completely before frosting.

5. While the cookies are baking, make the icing. Whisk together the confectioner’s sugar, the corn syrup, the water and the vanilla.

6. In a microwave safe bowl melt the chocolate by heating it for 45 seconds at half power.  Whisk in the cocoa powder. Add half of the frosting to the chocolate mixture. You may need to add more water (up to 2 T) and more corn syrup (up to 1 tsp) to make the frosting smooth.

7. Using a brush or offset spatula, frost the cookies. I did all of the one color, then all the other. If the chocolate frosting sets too much for it to be spreadable, microwave it briefly or add  a very little hot water.

Sunday, September 21, 2008

Christmas in ... September?


Well, it’s not exactly the Christmas season, but that hasn’t stopped me from hosting a Christmas party. It’s been a pretty stressful time as a second year law student, so one of my good friends suggested that I host a Christmas in September party, in the interest of spreading some good cheer. My friend took care of the crafts and decorations, and it was my job to make the cookies. I made three kinds, each of which will be making an appearance throughout the week.

These first cookies are an old family favorite. My mom found the recipe at least a few years ago, and it has since been a favorite. The cookies are fudgy, and the nonpareils in the center add a nice hit of chocolate. It’s important to add the candies while the cookies are still warm from the oven, so that they melt into the cookie. This is also how they are best eaten. I found the recipe reprinted here, no idea where it originated.

I have no idea how many cookies this makes. The website doesn’t say. I made 42 cookies, and still have between ½ and 1/3 of the dough remaining.

Chocolate Fudge Cookies

1/2 cup vegetable oil 
4 ounces semi-sweet chocolate, melted 
2 cup granulated sugar 
4 eggs 
2 tsp vanilla 
1/2 teaspoon salt 
2 cup flour 
2 tsp baking powder 
Phocolate nonpareil candies 
Powdered sugar

1. Mix the oil, chocolate and sugar. Add the eggs one at a time, beating fully after each addition. Sift the flour, salt and baking powder over the chocolate mixture, and whisk until a dough forms.

2. Refrigerate the dough for several hours, or overnight.

3. Preheat the oven to 350 degrees. Take the dough out of the fridge, and roll teaspoons of dough into balls. Roll each ball in powdered sugar. Put the cookies on a baking sheet, at least three inches between each cookie, and bake for 10 minutes.

4. As soon as the cookies are out of the oven, press a nonpareil into the top of each cookie.

Wednesday, August 13, 2008

Double Chocolate Cookies


I just do not seem to be able to stay away from the cookies in this Martha book. I generally don’t bake a lot of cookies, but I seem to be drawn to these. I think one of the reasons is that cookies tend to be easier to make than cupcakes (fewer steps and parts), and I seem to be more likely to have the ingredients I need sitting around the house. I didn’t really make these cookies to celebrate any particular occasion, more because I wanted something to bake, and something to post on the blog for the middle of the week (expect some more things this weekend).

This time I made Martha’s Giant Chocolate Sugar Cookies. The pictures in the book really lack anything to give you a sense of scale when looking at these cookies, make no mistake, these cookies are gigantic. They get the majority of their chocolate flavor from cocoa powder, though I decided to up it a little and add a cup of semisweet chocolate chips to half of the batch (I doubled the recipe to start with). I thought these cookies were good, but not as chocolaty as I really like in a Chocolate cookie. On the plus side, they really are huge, which can have presentation value

Martha’s Giant Chocolate Sugar Cookies

Makes 8-10

1 ½ cups AP flour
½ cup Dutch-process cocoa powder
1 tsp baking powder
½ tsp salt
½ cup (1 stick) unsalted butter, softened
1 ½ cups sugar
½ cup vegetable shortening, melted and allowed to cool (According to Martha this adds to the texture, but butter can be used in its place if you prefer).
1 large egg
1 ½ tsp vanilla

1. Preheat the oven to 375. Whisk together the flour, cocoa powder, baking powder and salt.

2. In the bowl of an electric mixer on medium high cream the butter with the sugar on medium high speed until fluffy. Add the shortening, followed by the egg and the vanilla. Mix until creamy.

3. Reduce speed to low and gradually add the dry ingredients until fully mixed.

4. Scoop dough using a 2 ½ inch ice cream scoop (I used a 1/3 cup), space the cookies at least 4 inches apart. Bake for 18-20 minutes, or until edges are firm (mine were done at 15). I also found that these baked better with only one sheet in the oven at a time.

Sunday, August 3, 2008

Pecan Bars


This is number three in the set of recipes I’ve made Martha’s Cookies book. I actually made these at the same time as I made the chocolate malted sandwich cookies, but it took me awhile to get around to posting them. These cookies were pretty tasty, but I was expecting the layer of caramel to be a little thicker from the picture in the book. I also thought the shortbread part of the cookie could have been a little thinner. If I were going to make the cookies again, I think I would make ¾ of the shortbread, and 1 ½ times the caramel. I also thought the caramel tasted a little strongly of honey at first, but that flavor mellowed. Even so, these cookies were definitely worth making, and got rave reviews from all my friends. This Cookie book has definitely been worthwhile, the recipes are a little truncated in their explanations, but they’ve all turned out very tasty.

Pecan Bars

Makes 1 13 x 9 pan, about 36 cookies

Crust:

1 cup plus 2 Tbs (2 ¼ sticks) unsalted butter, softened
¾ cup packed light brown sugar
½ tsp salt
3 cups AP flour

Filling:

½ cup (1 stick) unstalted butter
½ cup packed light brown sugar
¼ cup plus
2 Tbs honey
2 Tbs sugar
2 Tbs heavy cream
¼ tsp salt
2 cups pecan halves
½ tsp vanilla extract

1. Preheat the oven to 375 degrees. Cream the butter and brown sugar in the bowl of an electric mixer. Mix on medium speed until light and fluffy, about 2 minutes. Mix in the salt.

2. Add the flour 1 cup at a time, mixing until fully incorporated after each addition. Continue mixing until the dough comes together in large clumps.

3. Press the dough into a greased 9 x 13 inch baking pan. Pierce the dough with a fork. Chill the dough until firm, about 20 minutes.

4. Bake until golden brown, 18 to 20 minutes. Transfer to a wire rack to cool, and reduce the oven temperature to 325.

5. To make the filling (wait until the crust is mostly cooled to do this): place the butter, brown sugar, honey, granulated sugar, and heavy cream in a saucepan over high heat. Bring the mixture to a boil, stirring constantly until the mixture coats the back of a spoon, about 1 minute.

6. Remove from heat, and stir in salt, nuts, and vanilla. Pour the filling over the cooled crust.

7. Bake at 325 degrees until the filling begins to bubble, about 15-20 minutes.

8. Allow the cookies to cool completely. Run a knife around the edge of the pan, and invert onto a cooling rack, and then flip back over onto a cutting board. Use a serrated knife to cut into 1 x 3 inch bars.